

What is Linux?
Linux is an operating system, like macOS or Windows.
It powers the vast majority of the servers that compose the Internet. It’s the base upon which everything is built. But not just that. Android is based on (a modified version of) Linux.
The Linux “core” (called a kernel) was born in 1991 in Finland, and it has come a really long way from its humble beginnings. It went on to be the kernel of the GNU Operating System, creating the duo GNU/Linux.
There’s one thing about Linux that corporations like Microsoft, Apple, and Google will never be able to offer: the freedom to do whatever you want with your computer.
Linux is also special because there’s not just “one Linux”, like is the case with Windows or macOS. Instead, we have distributions.
A “distro” is made by a company or organization and packages the Linux core with additional programs and tooling.
For example you have Debian, Red Hat, and Ubuntu, probably the most popular distributions.
What is a Linux shell?
A shell is a command interpreter that exposes an interface to the user to work with the underlying operating system.
It allows you to execute operations using text and commands, and it provides users advanced features like being able to create scripts.
This is important: shells let you perform things in a more optimized way than a GUI (Graphical User Interface) could ever possibly let you do. Command line tools can offer many different configuration options without being too complex to use.
There are many different kind of shells. This post focuses on Unix shells, the ones that you will find commonly on Linux and macOS computers.
Many different kind of shells were created for those systems over time, and a few of them dominate the space: Bash, Csh, Zsh, Fish and many more!
All shells originate from the Bourne Shell, called sh. “Bourne” because its creator was Steve Bourne.
Bash means Bourne-again shell. sh was proprietary and not open source, and Bash was created in 1989 to create a free alternative for the GNU project and the Free Software Foundation. Since projects had to pay to use the Bourne shell, Bash became very popular.
If you use a Mac, try opening your Mac terminal. By default it runs ZSH (or, pre-Catalina, Bash).
You can set up your system to run any kind of shell – for example I use the Fish shell.
Each single shell has its own unique features and advanced usage, but they all share a common functionality: they can let you execute programs, and they can be programmed.
In the rest of this handbook we’ll see in detail the most common commands you will use.
The Linux man command
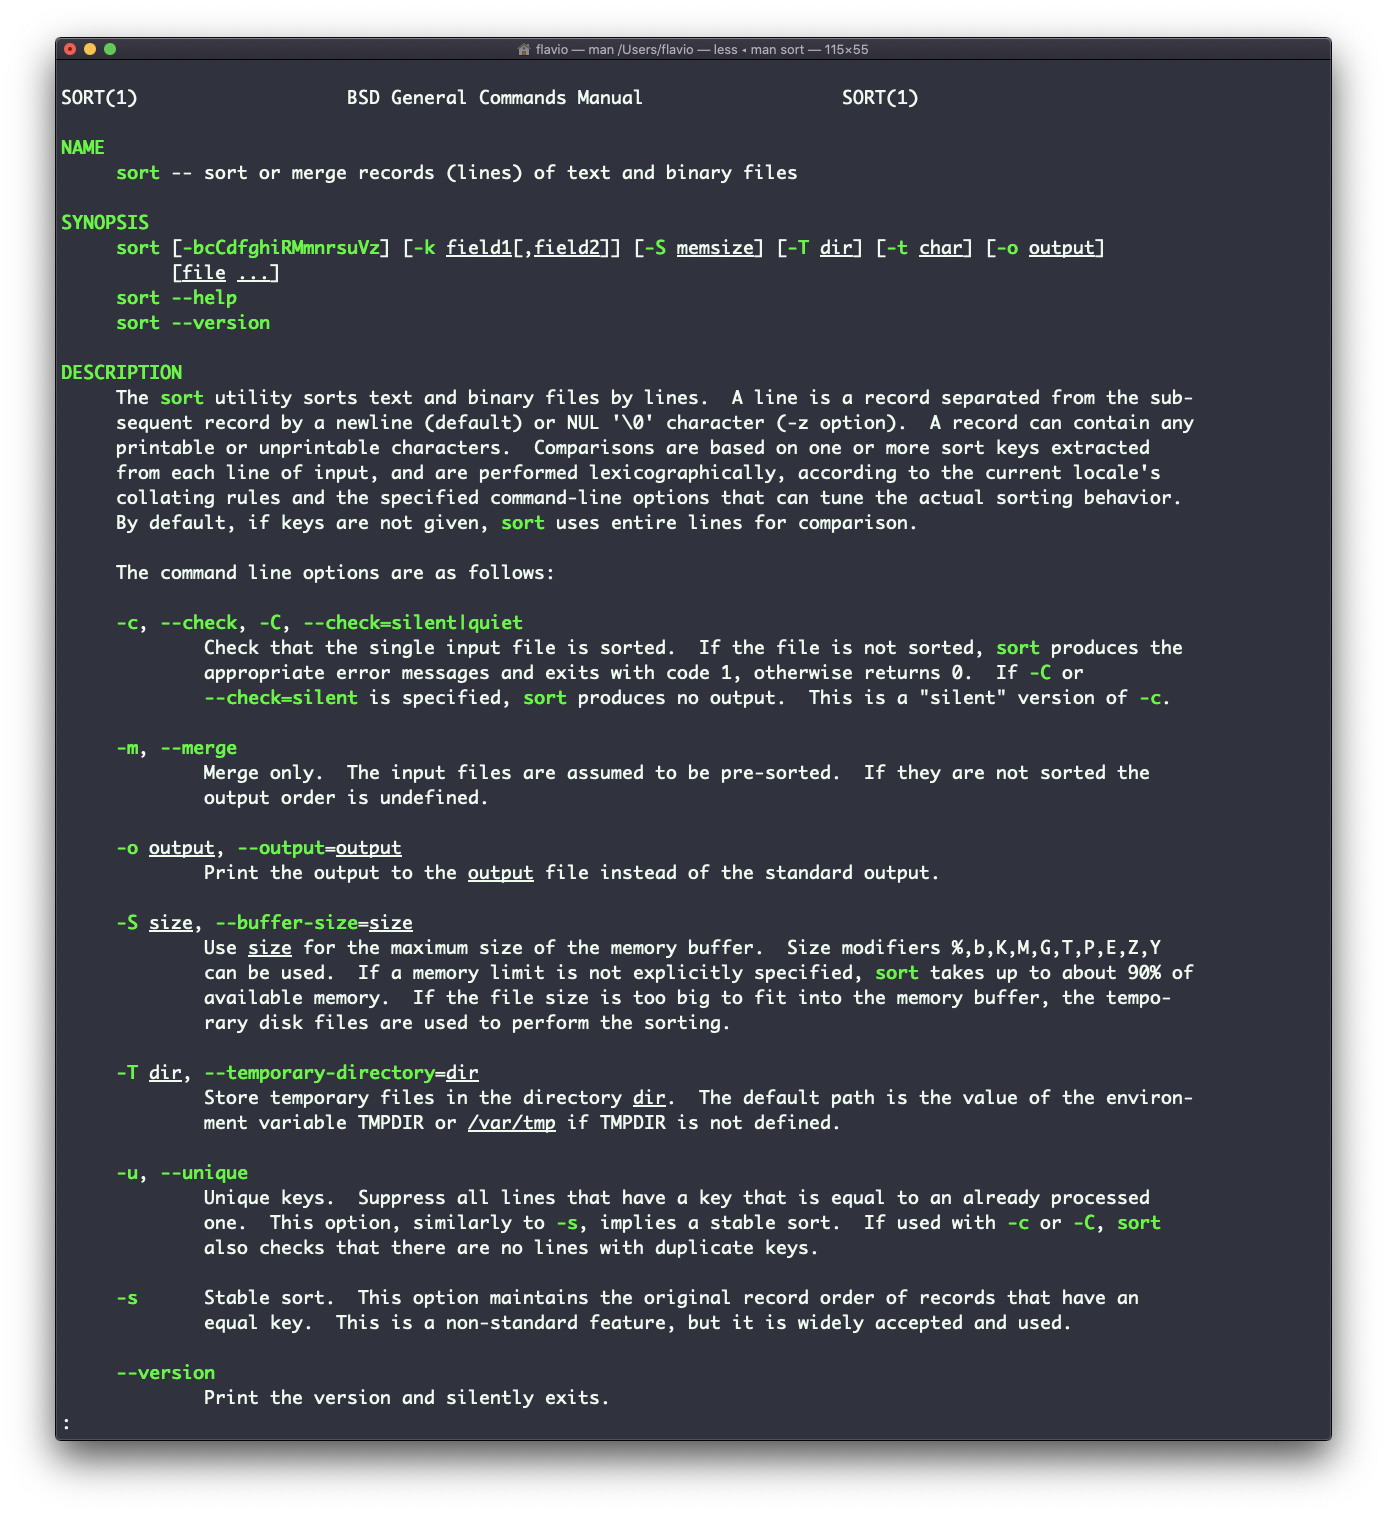
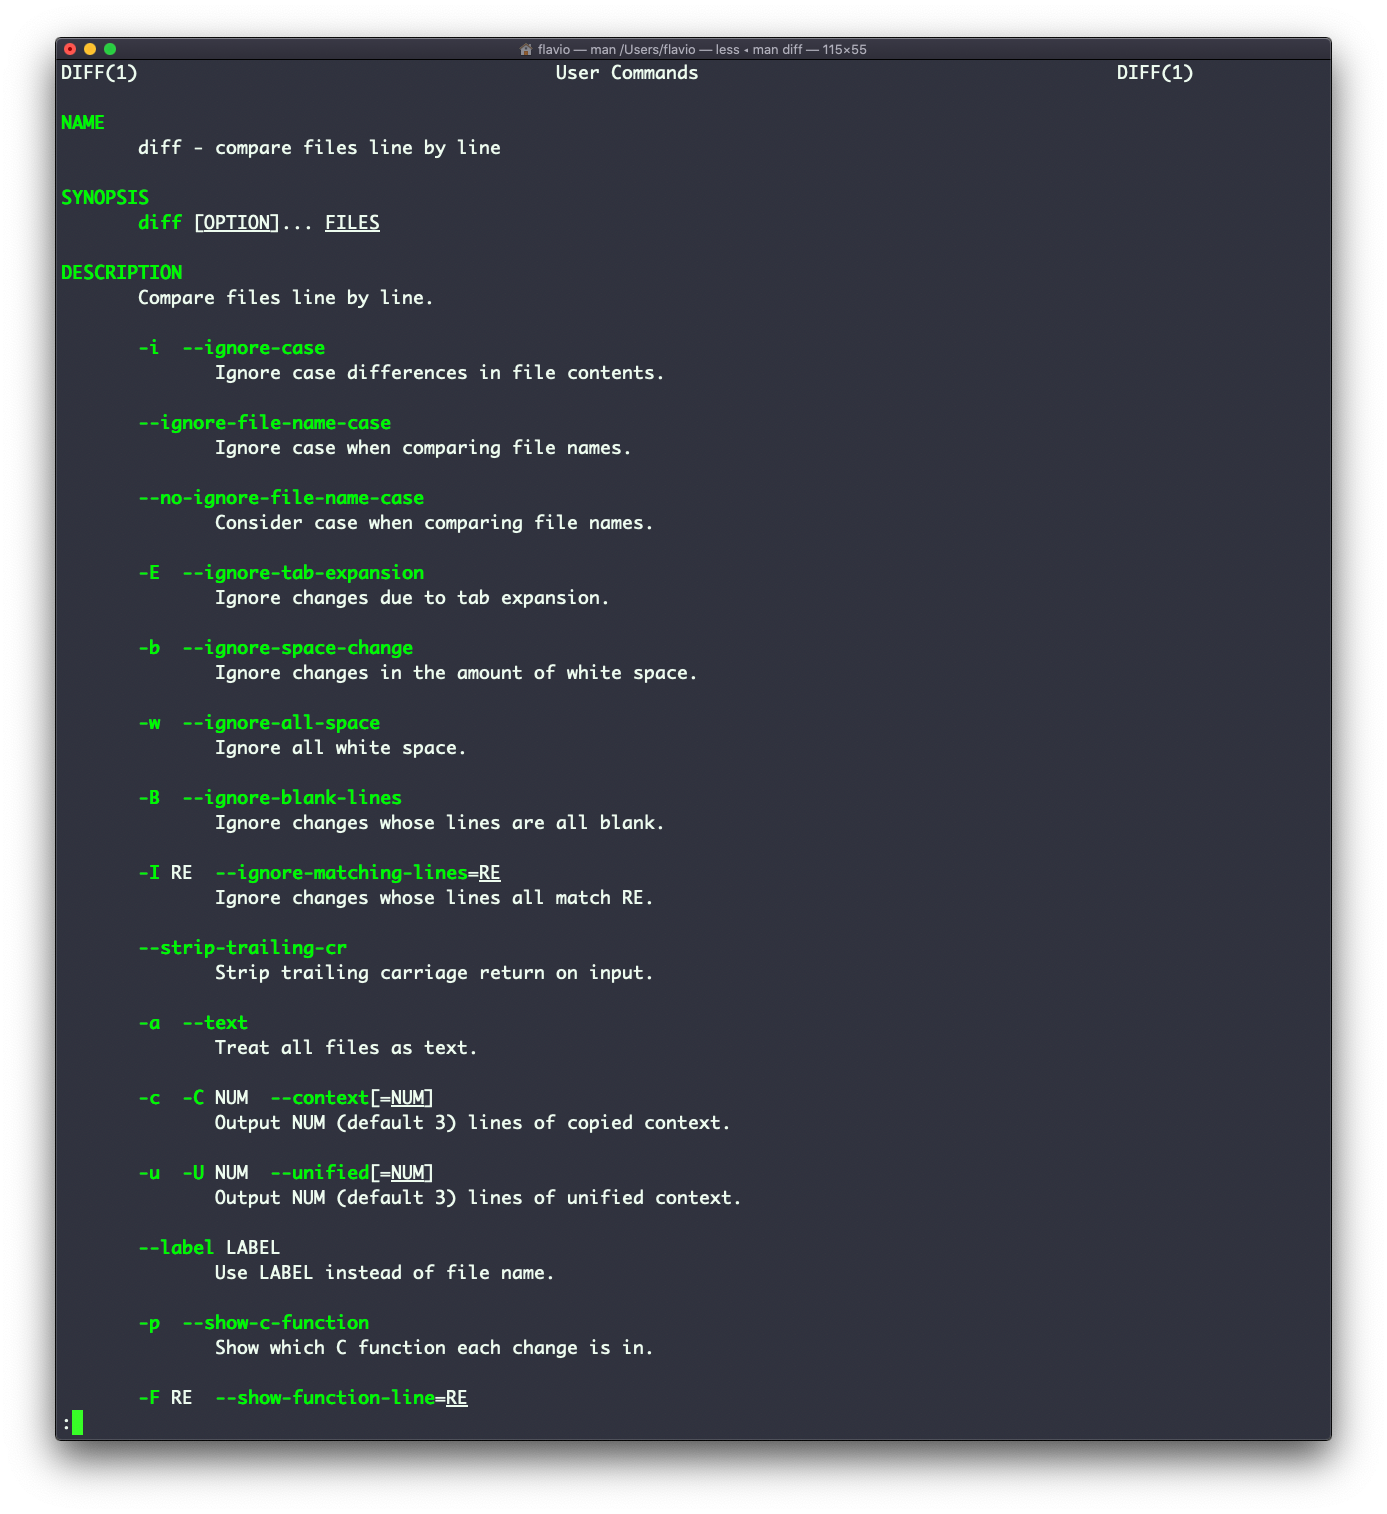
Every time I don’t know how to use a command, I type man <command> to get the manual:
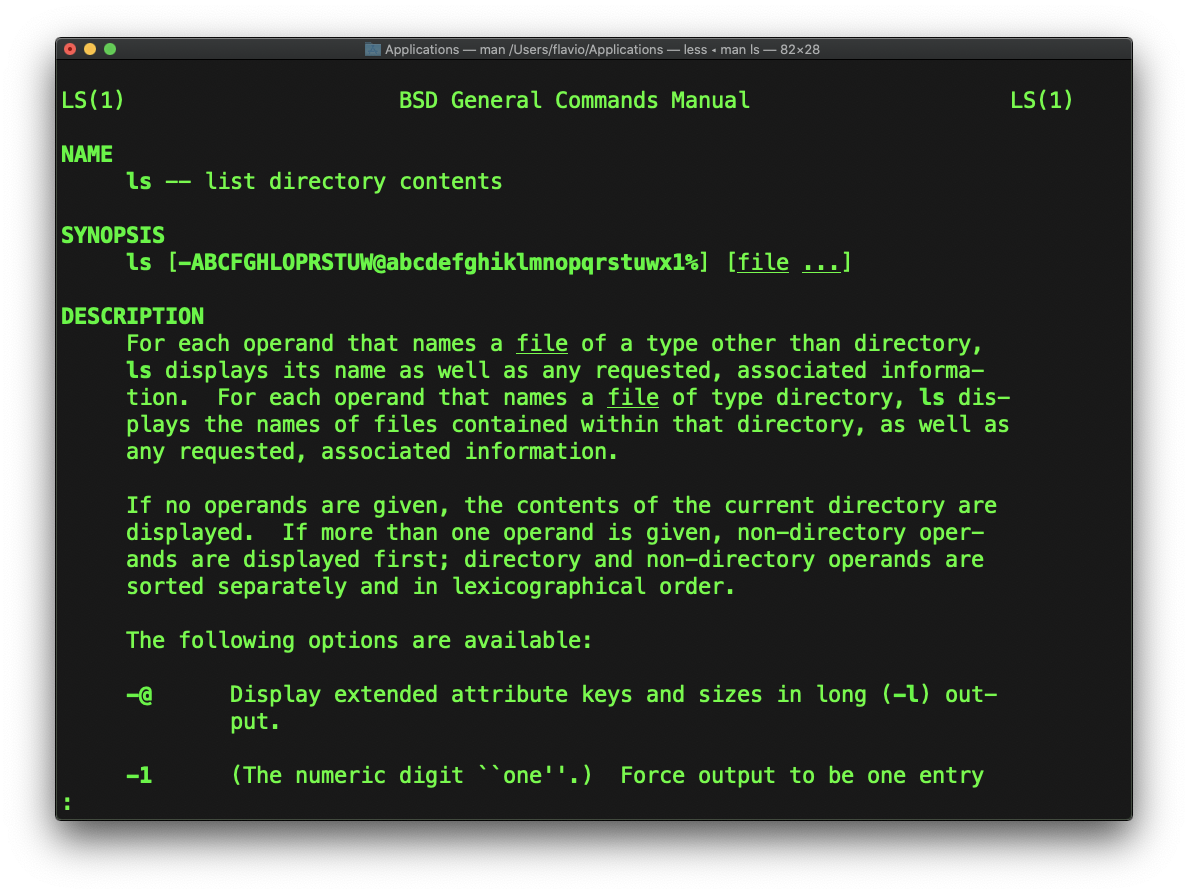
This is a man (from _manual_) page. Man pages are an essential tool to learn as a developer. They contain so much information that sometimes it’s almost too much.
The above screenshot is just 1 of 14 screens of explanation for the ls command.
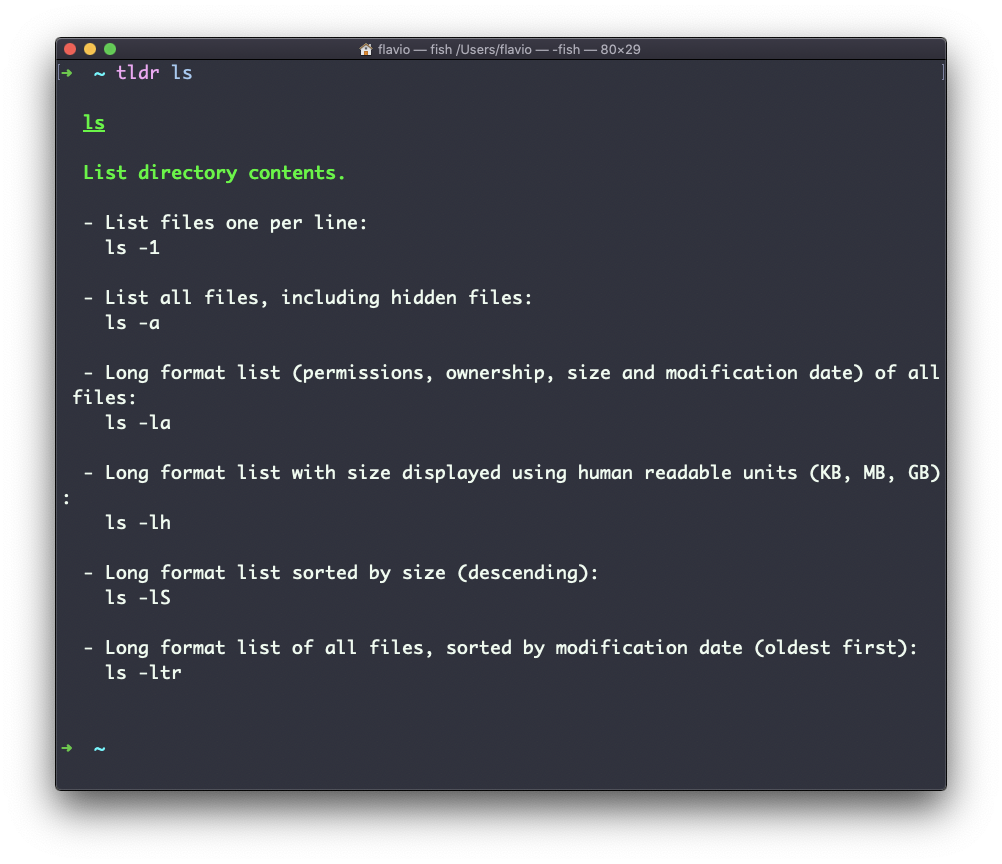
Most of the time when I need to learn a command quickly I use this site called tldr pages: https://tldr.sh. It’s a command you can install, which you then run like this: tldr <command>. It gives you a very quick overview of a command, with some handy examples of common usage scenarios:
The Linux ls command
Inside a folder you can list all the files that the folder contains using the ls command:
lsIf you add a folder name or path, it will print that folder’s contents:
ls /bin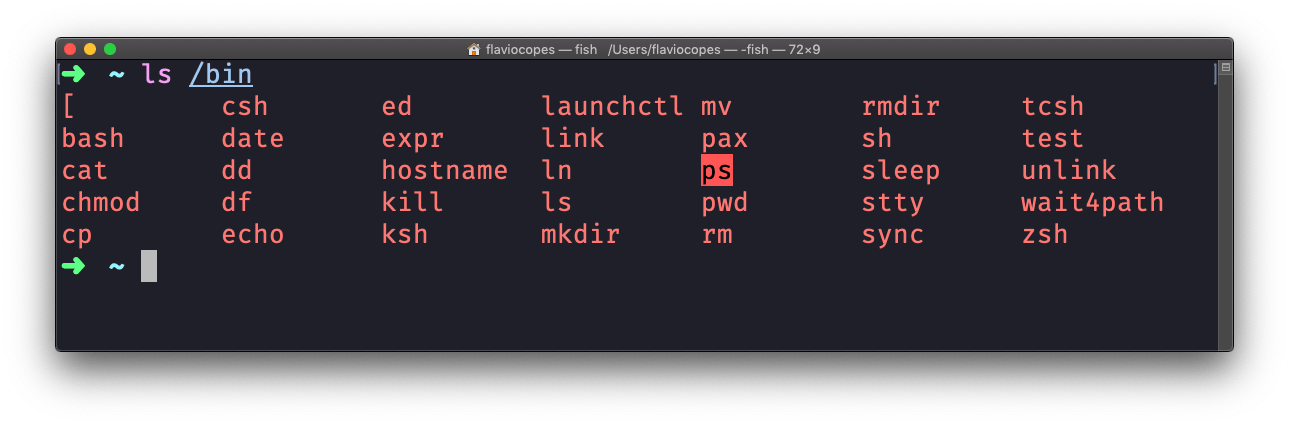
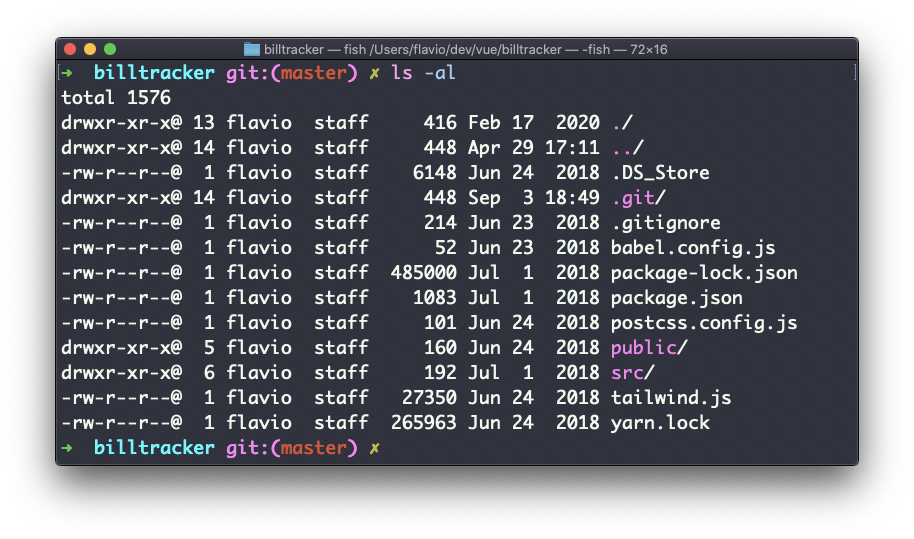
ls accepts a lot of options. One of my favorite combinations is -al. Try it:
ls -al /bin
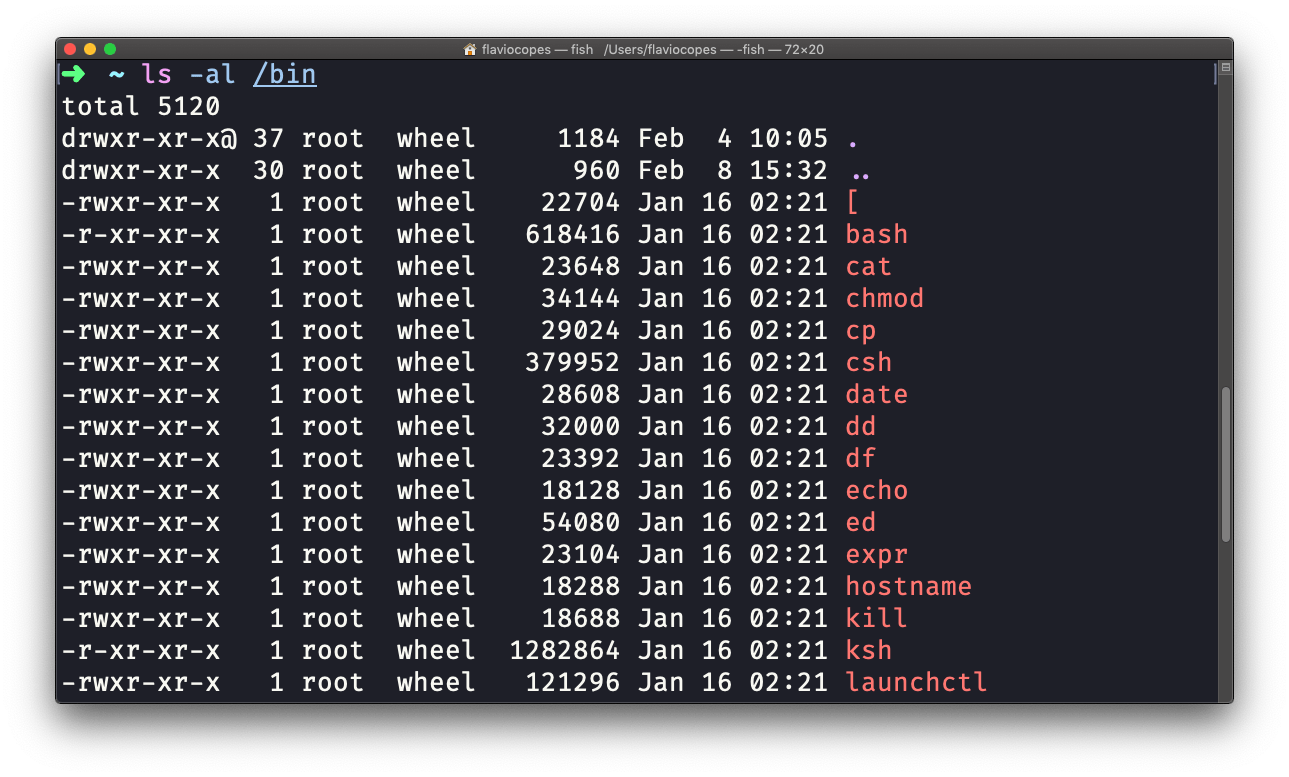
Compared to the plain ls command, this returns much more information.
You have, from left to right:
- the file permissions (and if your system supports ACLs, you get an ACL flag as well)
- the number of links to that file
- the owner of the file
- the group of the file
- the file size in bytes
- the file’s last modified datetime
- the file name
This set of data is generated by the l option. The a option instead also shows the hidden files.
Hidden files are files that start with a dot (.).
The Linux cd command
Once you have a folder, you can move into it using the cd command. cd means change directory. You invoke it specifying a folder to move into. You can specify a folder name, or an entire path.
Example:
mkdir fruits
cd fruits
Now you are in the fruits folder.
You can use the .. special path to indicate the parent folder:
cd .. #back to the home folder
The # character indicates the start of the comment, which lasts for the entire line after it’s found.
You can use it to form a path:
mkdir fruits
mkdir cars
cd fruits
cd ../cars
There is another special path indicator which is ., and indicates the current folder.
You can also use absolute paths, which start from the root folder /:
cd /etc
The Linux pwd command
Whenever you feel lost in the filesystem, call the pwd command to know where you are:
pwd
It will print the current folder path.
The Linux mkdir command
You create folders using the mkdir command:
mkdir fruits
You can create multiple folders with one command:
mkdir dogs cars
You can also create multiple nested folders by adding the -p option:
mkdir -p fruits/apples
Options in UNIX commands commonly take this form. You add them right after the command name, and they change how the command behaves. You can often combine multiple options, too.
You can find which options a command supports by typing man <commandname>. Try now with man mkdir for example (press the q key to esc the man page). Man pages are the amazing built-in help for UNIX.
The Linux rmdir command
Just as you can create a folder using mkdir, you can delete a folder using rmdir:
mkdir fruits
rmdir fruits
You can also delete multiple folders at once:
mkdir fruits cars
rmdir fruits cars
The folder you delete must be empty.
To delete folders with files in them, we’ll use the more generic rm command which deletes files and folders, using the -rf option:
rm -rf fruits cars
Be careful as this command does not ask for confirmation and it will immediately remove anything you ask it to remove.
There is no bin when removing files from the command line, and recovering lost files can be hard.
The Linux mv command
Once you have a file, you can move it around using the mv command. You specify the file current path, and its new path:
touch test
mv pear new_pear
The pear file is now moved to new_pear. This is how you rename files and folders.
If the last parameter is a folder, the file located at the first parameter path is going to be moved into that folder. In this case, you can specify a list of files and they will all be moved in the folder path identified by the last parameter:
touch pear
touch apple
mkdir fruits
mv pear apple fruits #pear and apple moved to the fruits folder
The Linux cp command
You can copy a file using the cp command:
touch test
cp apple another_apple
To copy folders you need to add the -r option to recursively copy the whole folder contents:
mkdir fruits
cp -r fruits cars
The Linux open command
The open command lets you open a file using this syntax:
open <filename>
You can also open a directory, which on macOS opens the Finder app with the current directory open:
open <directory name>
I use it all the time to open the current directory:
open .
The special
.symbol points to the current directory, as..points to the parent directory
The same command can also be be used to run an application:
open <application name>
The Linux touch command
You can create an empty file using the touch command:
touch apple
If the file already exists, it opens the file in write mode, and the timestamp of the file is updated.
The Linux find command
The find command can be used to find files or folders matching a particular search pattern. It searches recursively.
Let’s learn how to use it by example.
Find all the files under the current tree that have the .js extension and print the relative path of each file that matches:
find . -name '*.js'
It’s important to use quotes around special characters like * to avoid the shell interpreting them.
Find directories under the current tree matching the name “src”:
find . -type d -name src
Use -type f to search only files, or -type l to only search symbolic links.
-name is case sensitive. use -iname to perform a case-insensitive search.
You can search under multiple root trees:
find folder1 folder2 -name filename.txt
Find directories under the current tree matching the name “node_modules” or ‘public’:
find . -type d -name node_modules -or -name public
You can also exclude a path using -not -path:
find . -type d -name '*.md' -not -path 'node_modules/*'
You can search files that have more than 100 characters (bytes) in them:
find . -type f -size +100c
Search files bigger than 100KB but smaller than 1MB:
find . -type f -size +100k -size -1M
Search files edited more than 3 days ago:
find . -type f -mtime +3
Search files edited in the last 24 hours:
find . -type f -mtime -1
You can delete all the files matching a search by adding the -delete option. This deletes all the files edited in the last 24 hours:
find . -type f -mtime -1 -delete
You can execute a command on each result of the search. In this example we run cat to print the file content:
find . -type f -exec cat {} \;
Notice the terminating \;. {} is filled with the file name at execution time.
The Linux ln command
The ln command is part of the Linux file system commands.
It’s used to create links. What is a link? It’s like a pointer to another file, or a file that points to another file. You might be familiar with Windows shortcuts. They’re similar.
We have 2 types of links: hard links and soft links.
Hard links
Hard links are rarely used. They have a few limitations: you can’t link to directories, and you can’t link to external filesystems (disks).
A hard link is created using the following syntax:
ln <original> <link>
For example, say you have a file called recipes.txt. You can create a hard link to it using:
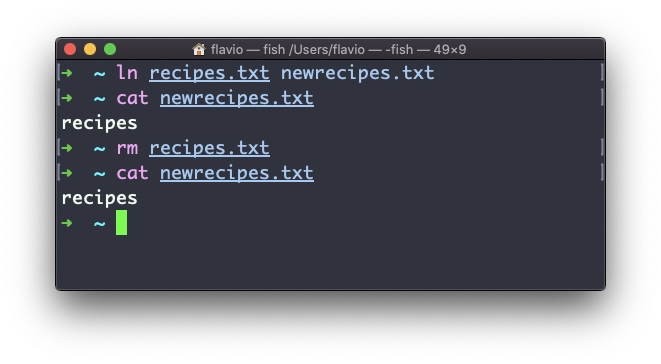
ln recipes.txt newrecipes.txt
The new hard link you created is indistinguishable from a regular file:
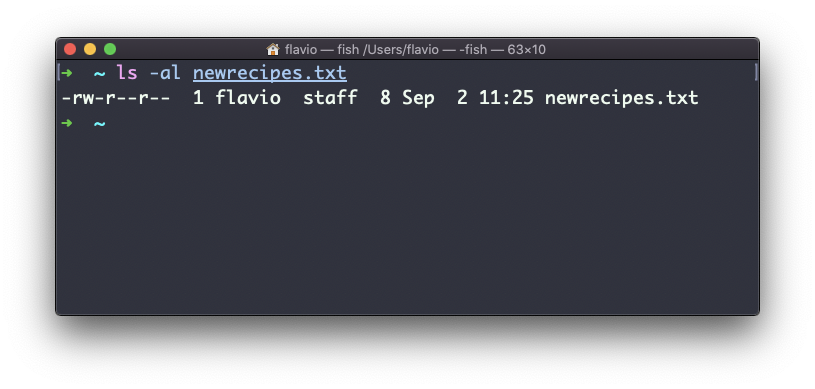
Now any time you edit any of those files, the content will be updated for both.
If you delete the original file, the link will still contain the original file content, as that’s not removed until there is one hard link pointing to it.
Soft links
Soft links are different. They are more powerful as you can link to other filesystems and to directories. But keep in mind that when the original is removed, the link will be broken.
You create soft links using the -s option of ln:
ln -s <original> <link>
For example, say you have a file called recipes.txt. You can create a soft link to it using:
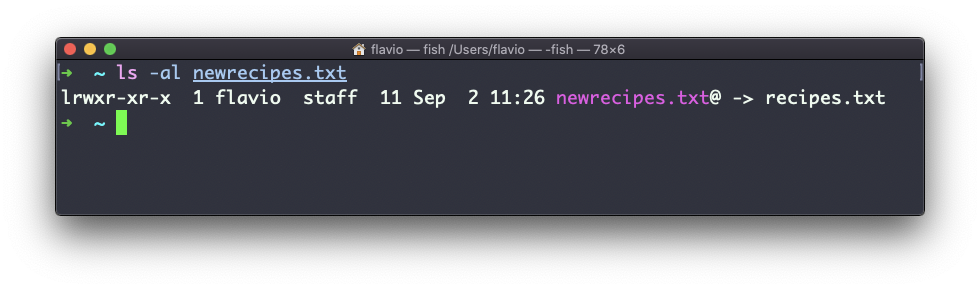
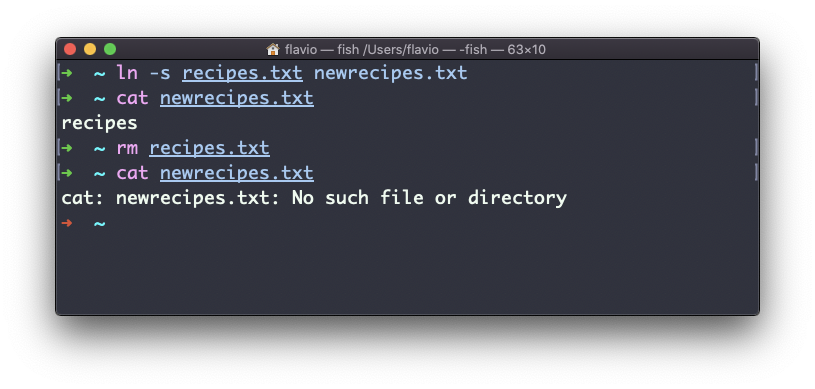
ln -s recipes.txt newrecipes.txt
In this case you can see there’s a special l flag when you list the file using ls -al. The file name has a @ at the end, and it’s also colored differently if you have colors enabled:
Now if you delete the original file, the links will be broken, and the shell will tell you “No such file or directory” if you try to access it:
The Linux gzip command
You can compress a file using the gzip compression protocol named LZ77 using the gzip command.
Here’s the simplest usage:
gzip filename
This will compress the file, and append a .gz extension to it. The original file is deleted.
To prevent this, you can use the -c option and use output redirection to write the output to the filename.gz file:
gzip -c filename > filename.gz
The
-coption specifies that the output will go to the standard output stream, leaving the original file intact.
Or you can use the -k option:
gzip -k filename
There are various levels of compression. The more the compression, the longer it will take to compress (and decompress). Levels range from 1 (fastest, worst compression) to 9 (slowest, better compression), and the default is 6.
You can choose a specific level with the -<NUMBER> option:
gzip -1 filename
You can compress multiple files by listing them:
gzip filename1 filename2
You can compress all the files in a directory, recursively, using the -r option:
gzip -r a_folder
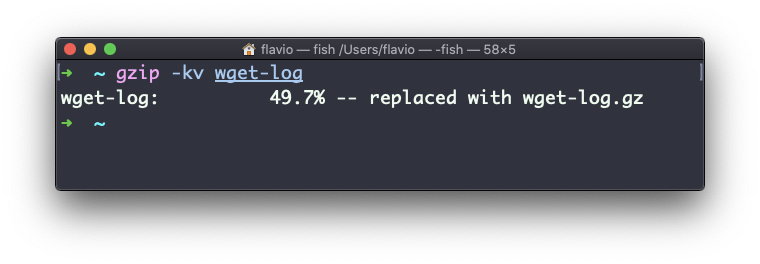
The -v option prints the compression percentage information. Here’s an example of it being used along with the -k (keep) option:
gzip can also be used to decompress a file, using the -d option:
gzip -d filename.gzThe Linux tar command
The tar command is used to create an archive, grouping multiple files in a single file.
Its name comes from the past and means tape archive (back when archives were stored on tapes).
This command creates an archive named archive.tar with the content of file1 and file2:
tar -cf archive.tar file1 file2
The
coption stands for create. Thefoption is used to write to file the archive.
To extract files from an archive in the current folder, use:
tar -xf archive.tar
the
xoption stands for extract.
And to extract them to a specific directory, use:
tar -xf archive.tar -C directory
You can also just list the files contained in an archive:
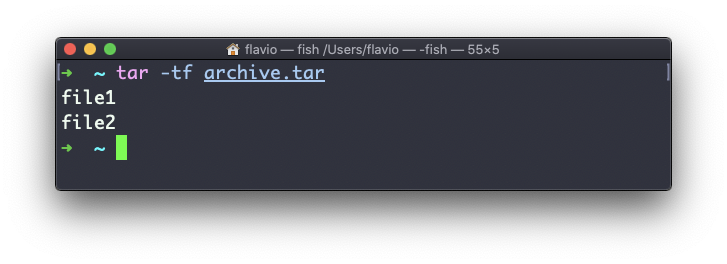
tar is often used to create a compressed archive, gzipping the archive.
This is done using the z option:
tar -czf archive.tar.gz file1 file2
This is just like creating a tar archive, and then running gzip on it.
To unarchive a gzipped archive, you can use gunzip, or gzip -d, and then unarchive it. But tar -xf will recognize it’s a gzipped archive, and do it for you:
tar -xf archive.tar.gz
The Linux alias command
It’s common to always run a program with a set of options that you like using.
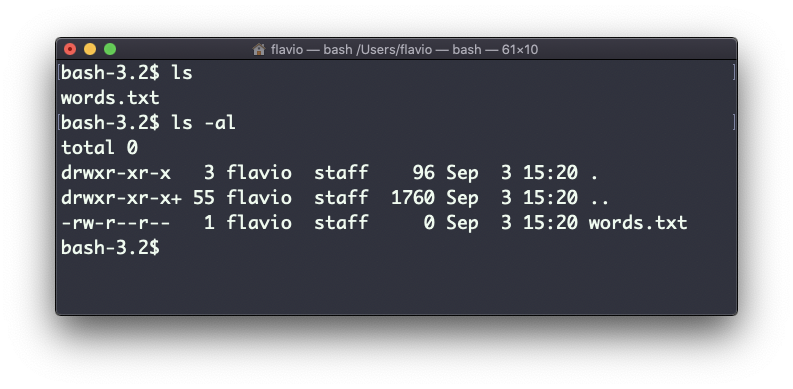
For example, take the ls command. By default it prints very little information:
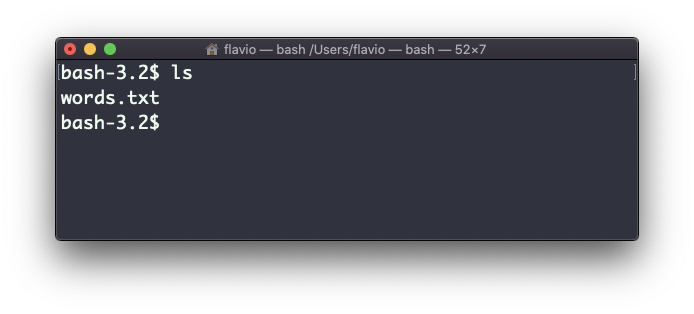
But if you use the -al option it will print something more useful, including the file modification date, the size, the owner, and the permissions. It will also list hidden files (files starting with a .):
You can create a new command, for example I like to call it ll, that is an alias to ls -al.
You do it like this:
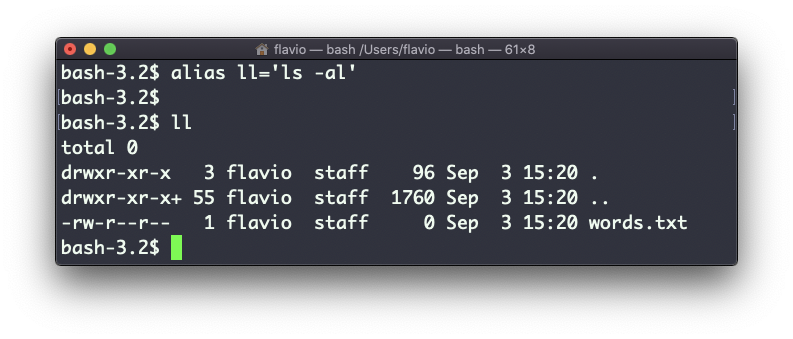
alias ll='ls -al'
Once you do, you can call ll just like it was a regular UNIX command:
Now calling alias without any option will list the aliases defined:
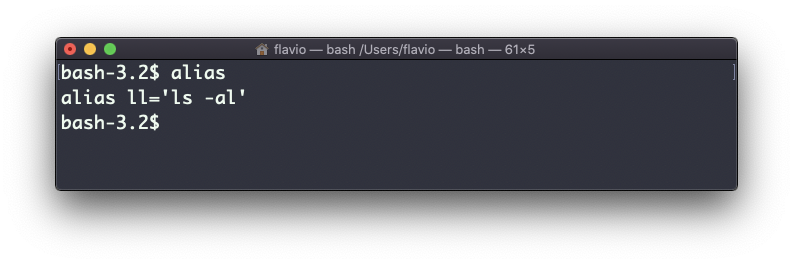
The alias will work until the terminal session is closed.
To make it permanent, you need to add it to the shell configuration. This could be ~/.bashrc or ~/.profile or ~/.bash_profile if you use the Bash shell, depending on the use case.
Be careful with quotes if you have variables in the command: if you use double quotes, the variable is resolved at definition time. If you use use single quotes, it’s resolved at invocation time. Those 2 are different:
alias lsthis="ls $PWD"
alias lscurrent='ls $PWD'
$PWD refers to the current folder the shell is in. If you now navigate away to a new folder, lscurrent lists the files in the new folder, whereas lsthis still lists the files in the folder where you were when you defined the alias.
The Linux cat command
Similar to tail in some ways, we have cat. Except cat can also add content to a file, and this makes it super powerful.
In its simplest usage, cat prints a file’s content to the standard output:
cat file
You can print the content of multiple files:
cat file1 file2
and using the output redirection operator > you can concatenate the content of multiple files into a new file:
cat file1 file2 > file3
Using >> you can append the content of multiple files into a new file, creating it if it does not exist:
cat file1 file2 >> file3
When you’re looking at source code files it’s helpful to see the line numbers. You can have cat print them using the -n option:
cat -n file1
You can only add a number to non-blank lines using -b, or you can also remove all the multiple empty lines using -s.
cat is often used in combination with the pipe operator | to feed a file’s content as input to another command: cat file1 | anothercommand.
The Linux less command
The less command is one I use a lot. It shows you the content stored inside a file, in a nice and interactive UI.
Usage: less <filename>.
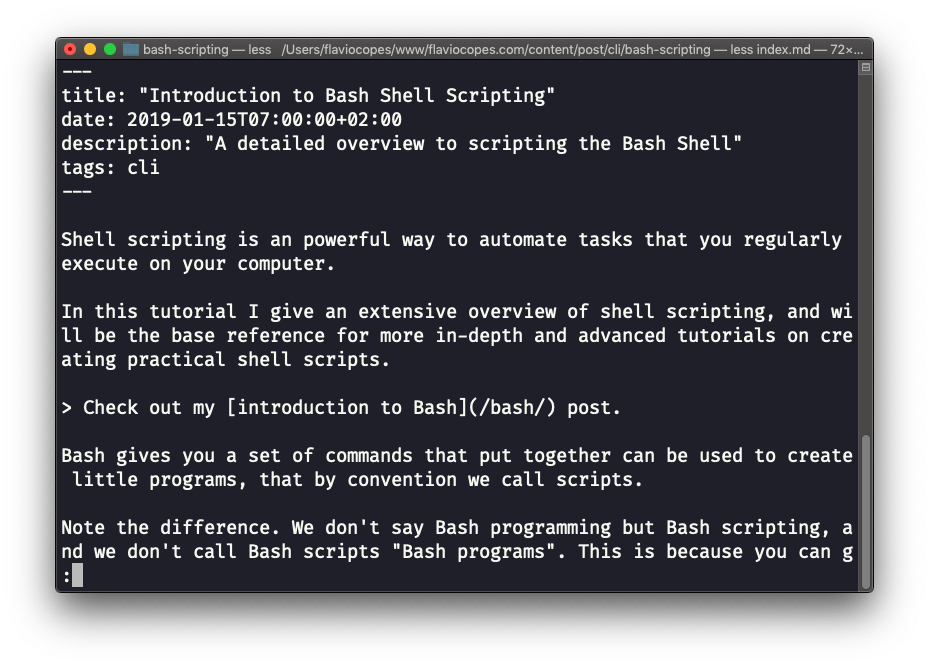
Once you are inside a less session, you can quit by pressing q.
You can navigate the file contents using the up and down keys, or using the space bar and b to navigate page by page. You can also jump to the end of the file pressing G and jump back to the start by pressing g.
You can search contents inside the file by pressing / and typing a word to search. This searches forward. You can search backwards using the ? symbol and typing a word.
This command just visualises the file’s content. You can directly open an editor by pressing v. It will use the system editor, which in most cases is vim.
Pressing the F key enters follow mode, or watch mode. When the file is changed by someone else, like from another program, you get to see the changes live.
This doesn’t happen by default, and you only see the file version at the time you opened it. You need to press ctrl-C to quit this mode. In this case the behaviour is similar to running the tail -f <filename> command.
You can open multiple files, and navigate through them using :n (to go to the next file) and :p (to go to the previous).
The Linux tail command
The best use case of tail in my opinion is when called with the -f option. It opens the file at the end, and watches for file changes.
Any time there is new content in the file, it is printed in the window. This is great for watching log files, for example:
tail -f /var/log/system.log
To exit, press ctrl-C.
You can print the last 10 lines in a file:
tail -n 10 <filename>
You can print the whole file content starting from a specific line using + before the line number:
tail -n +10 <filename>
tail can do much more and as always my advice is to check man tail.
The Linux wc command
The wc command gives us useful information about a file or input it receives via pipes.
echo test >> test.txt
wc test.txt
1       1       5 test.txt
Example via pipes, we can count the output of running the ls -al command:
ls -al | wc
6      47     284
The first column returned is the number of lines. The second is the number of words. The third is the number of bytes.
We can tell it to just count the lines:
wc -l test.txt
or just the words:
wc -w test.txt
or just the bytes:
wc -c test.txt
Bytes in ASCII charsets equate to characters. But with non-ASCII charsets, the number of characters might differ because some characters might take multiple bytes (for example this happens in Unicode).
In this case the -m flag will help you get the correct value:
wc -m test.txt
The Linux grep command
The grep command is a very useful tool. When you master it, it will help you tremendously in your day to day coding.
If you’re wondering,
grepstands for global regular expression print.
You can use grep to search in files, or combine it with pipes to filter the output of another command.
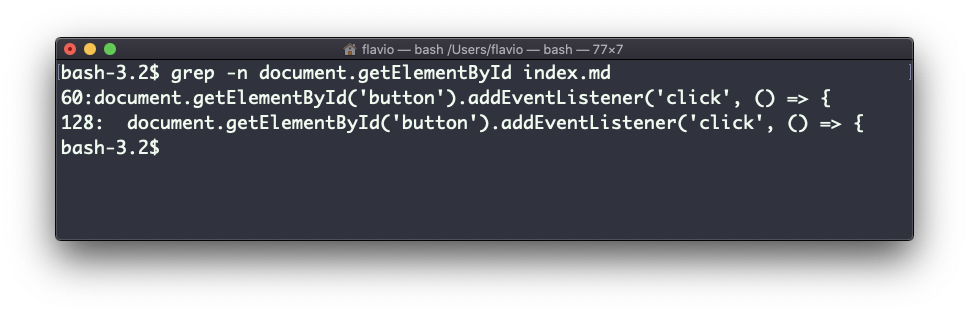
For example here’s how we can find the occurences of the document.getElementById line in the index.md file:
grep -n document.getElementById index.md
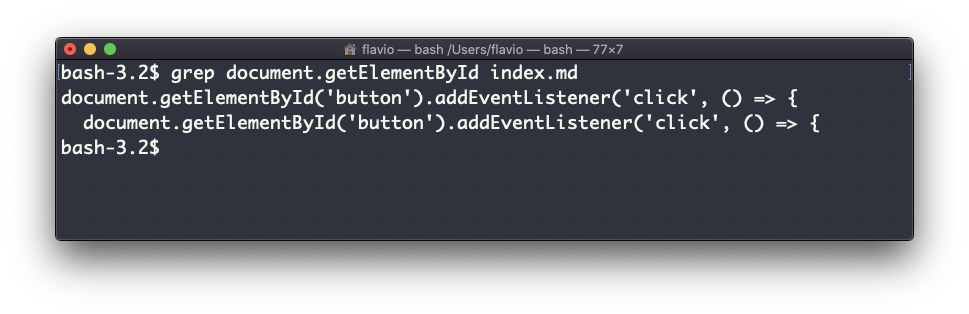
Using the -n option it will show the line numbers:
grep -n document.getElementById index.md
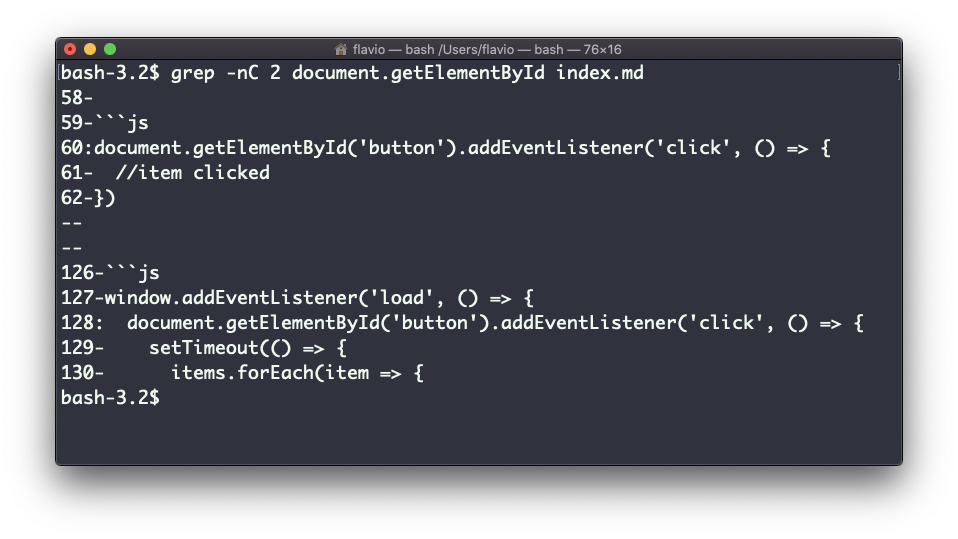
One very useful thing is to tell grep to print 2 lines before and 2 lines after the matched line to give you more context. That’s done using the -C option, which accepts a number of lines:
grep -nC 2 document.getElementById index.md
Search is case sensitive by default. Use the -i flag to make it insensitive.
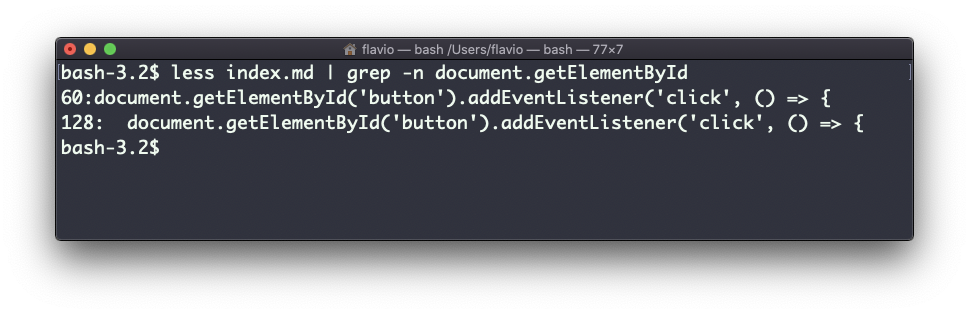
As mentioned, you can use grep to filter the output of another command. We can replicate the same functionality as above using:
less index.md | grep -n document.getElementById
The search string can be a regular expression, and this makes grep very powerful.
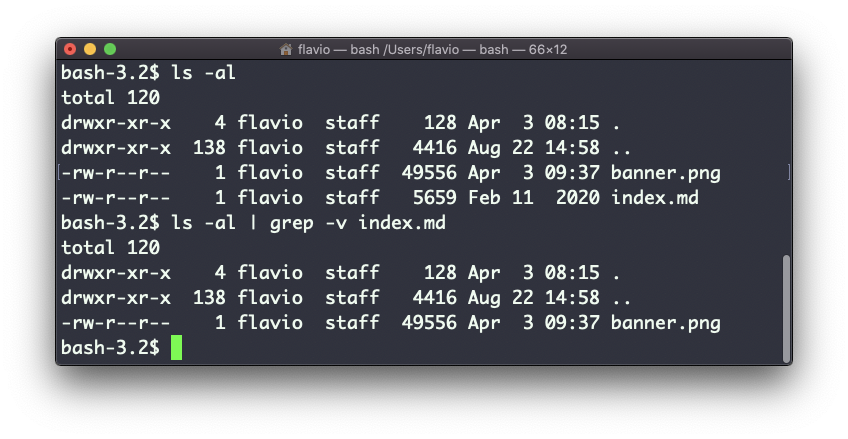
Another thing you might find very useful is to invert the result, excluding the lines that match a particular string, using the -v option:
pgrep command
You can use pgrep command to find process ID (PID) too:
pgrep process
pgrep firefox
pgrep vim
How to kill process in Linux from the command line?
Linux and Unix-like operating system support the standard terminate signals listed below:
- SIGHUP (1) – Hangup detected on controlling terminal or death of controlling process. Use SIGHUP to reload configuration files and open/close log files.
- SIGKILL (9) – Kill signal. Use SIGKILL as a last resort to kill process. It will not save data or cleaning kill the process.
- SIGTERM (15) – Termination signal. It is the default and safest way to kill process.
also I recommend the syntax :
kill -15 PIDPS: The kill and killall command support more than 60 signals. However, most users only need to use signal 9 or 15. To get a full list of signals, type:
kill -l
The Linux sort command
Suppose you have a text file which contains the names of dogs:
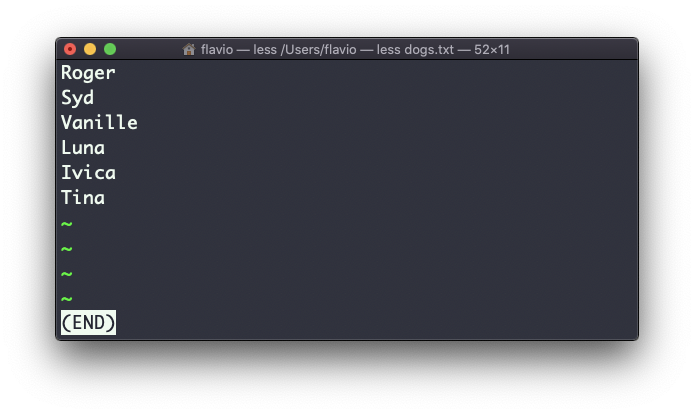
This list is unordered.
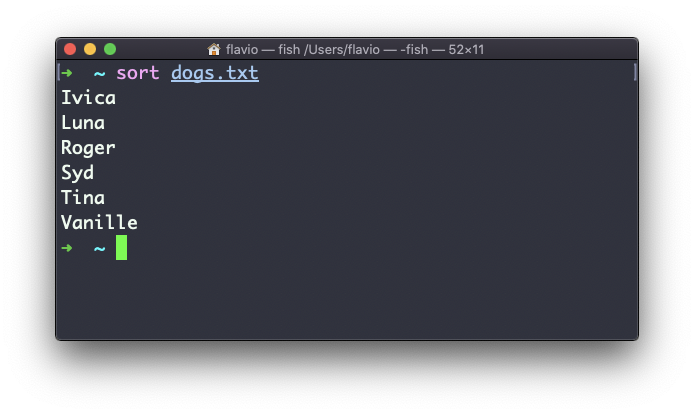
The sort command helps you sort them by name:
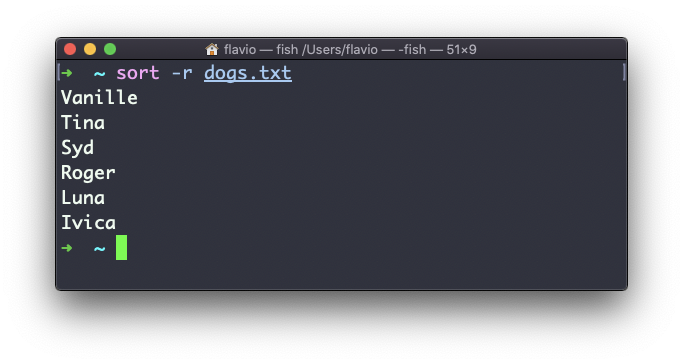
Use the r option to reverse the order:
Sorting by default is case sensitive, and alphabetic. Use the --ignore-case option to sort case insensitive, and the -n option to sort using a numeric order.
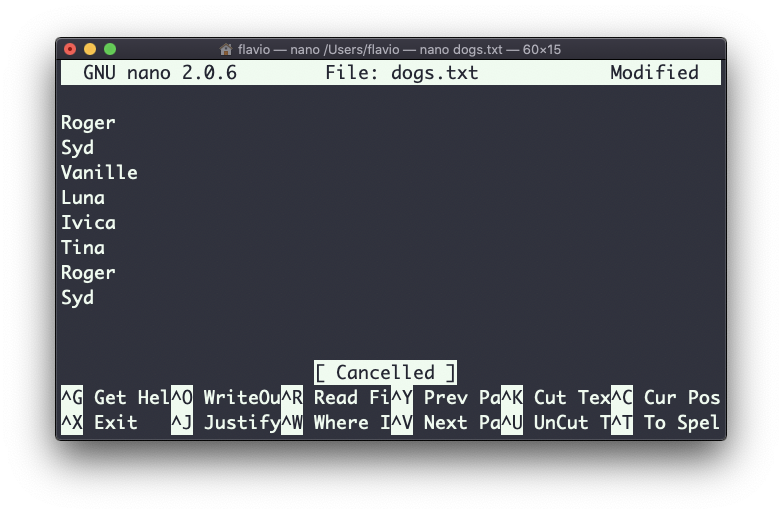
If the file contains duplicate lines:
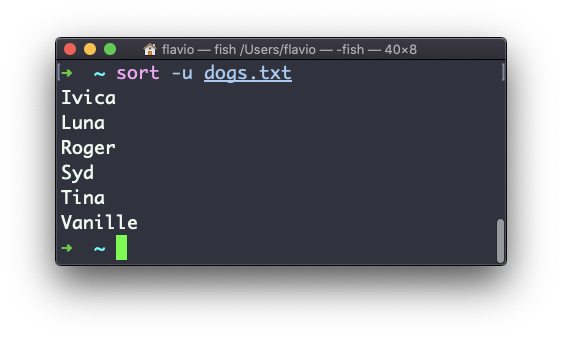
You can use the -u option to remove them:
sort does not just work on files, as many UNIX commands do – it also works with pipes. So you can use it on the output of another command. For example you can order the files returned by ls with:
ls | sort
sort is very powerful and has lots more options, which you can explore by calling man sort.
The Linux uniq command
uniq is a command that helps you sort lines of text.
You can get those lines from a file, or using pipes from the output of another command:
uniq dogs.txt

ls | uniq
You need to consider this key thing: uniq will only detect adjacent duplicate lines.
This implies that you will most likely use it along with sort:
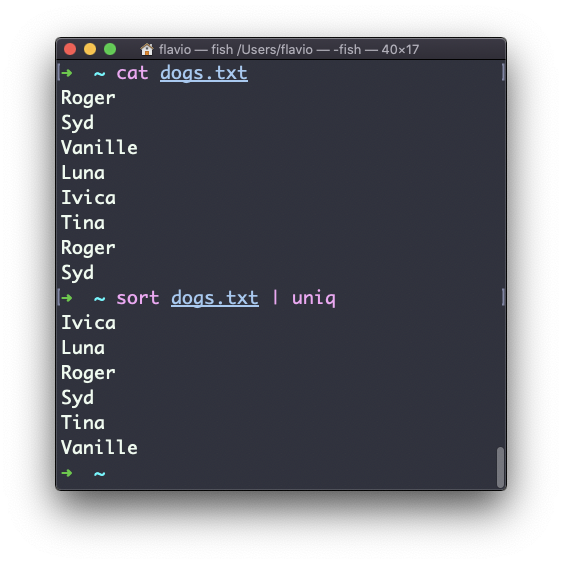
sort dogs.txt | uniq
The sort command has its own way to remove duplicates with the -u (unique) option. But uniq has more power.
By default it removes duplicate lines:
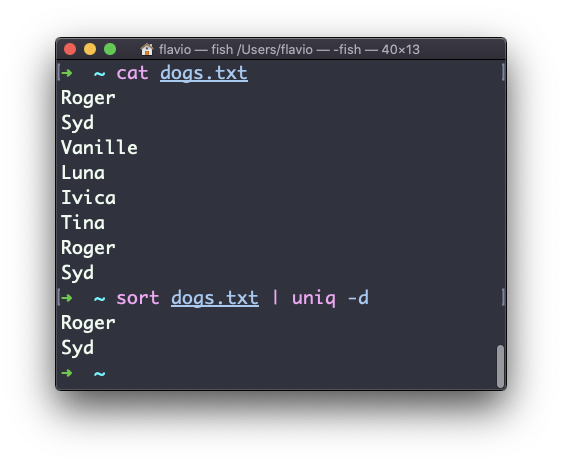
You can tell it to only display duplicate lines, for example, with the -d option:
sort dogs.txt | uniq -d
You can use the -u option to only display non-duplicate lines:

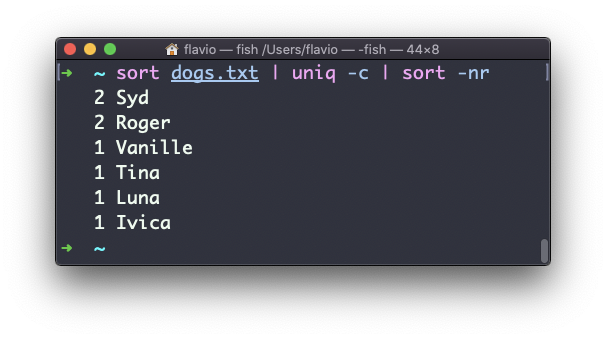
You can count the occurrences of each line with the -c option:

Use the special combination:
sort dogs.txt | uniq -c | sort -nr
to then sort those lines by most frequent:
The Linux diff command
diff is a handy command. Suppose you have 2 files, which contain almost the same information, but you can’t find the difference between the two.
diff will process the files and will tell you what’s the difference.
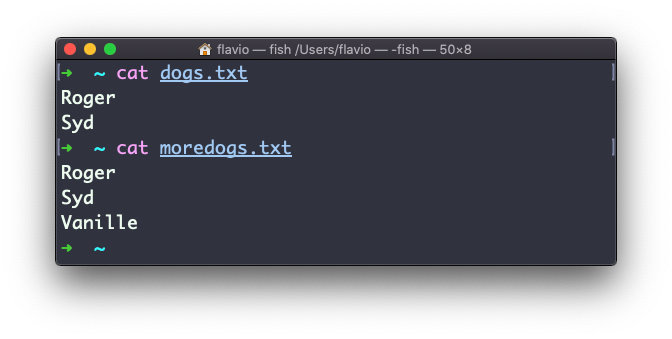
Suppose you have 2 files: dogs.txt and moredogs.txt. The difference is that moredogs.txt contains one more dog name:
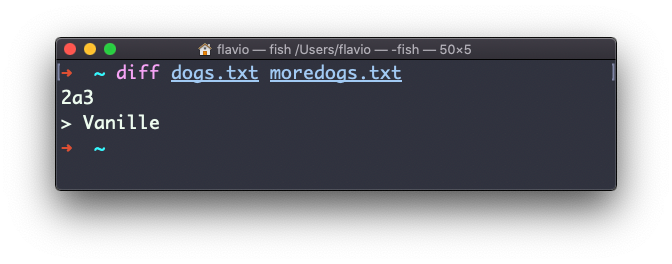
diff dogs.txt moredogs.txt will tell you the second file has one more line, line 3 with the line Vanille:
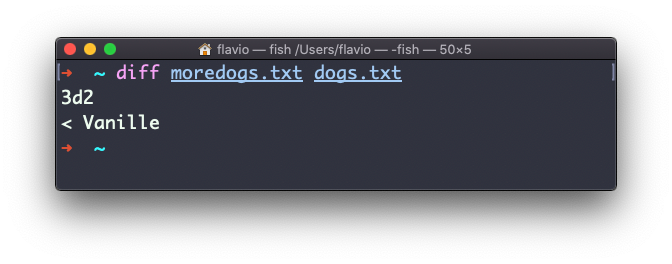
If you invert the order of the files, it will tell you that the second file is missing line 3, whose content is Vanille:
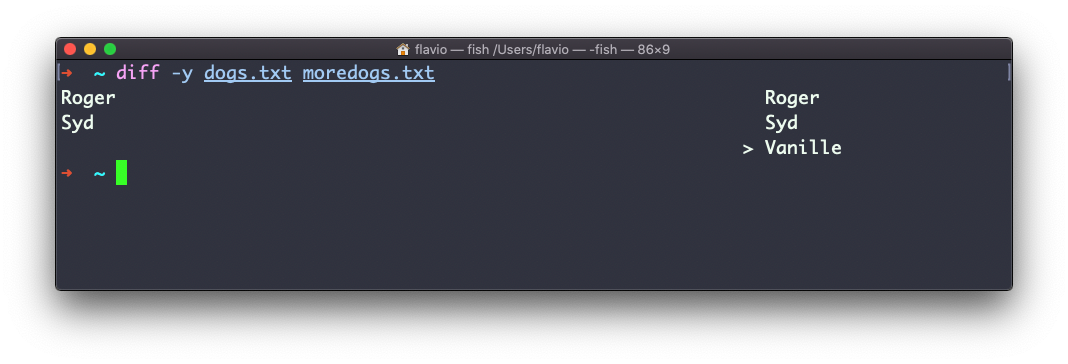
Using the -y option will compare the 2 files line by line:
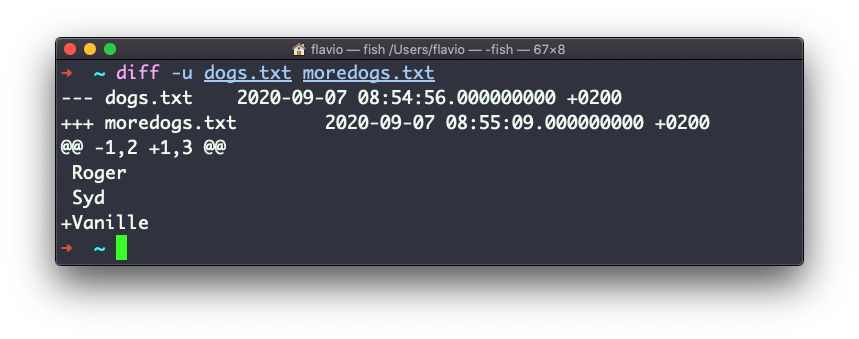
The -u option however will be more familiar to you, because that’s the same used by the Git version control system to display differences between versions:
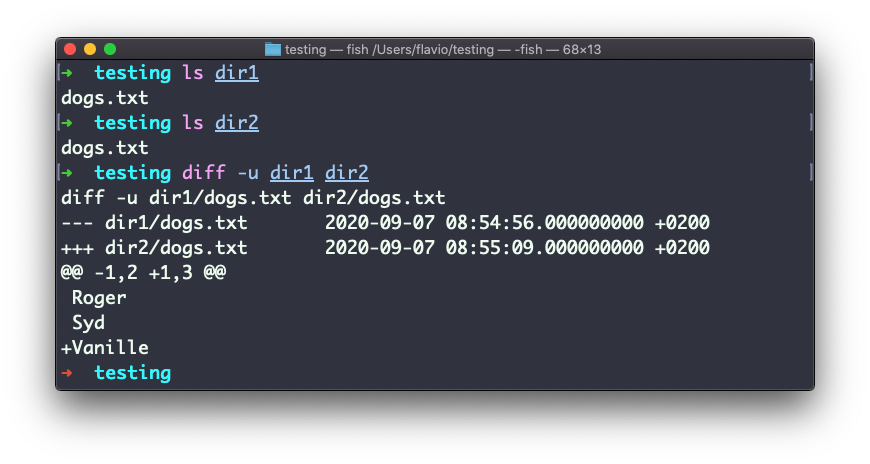
Comparing directories works in the same way. You must use the -r option to compare recursively (going into subdirectories):
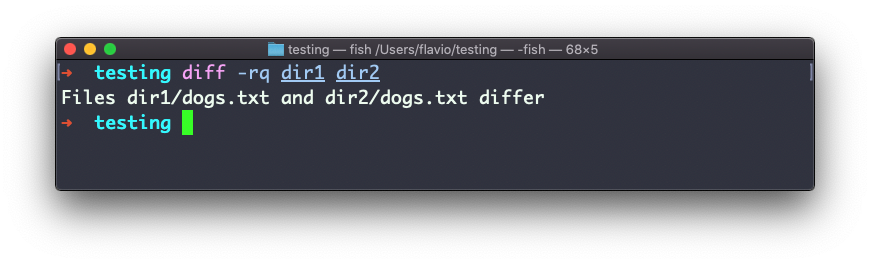
In case you’re interested in which files differ, rather than the content, use the r and q options:
There are many more options you can explore in the man page by running man diff:
The Linux chmod command
Every file in the Linux / macOS Operating Systems (and UNIX systems in general) has 3 permissions: read, write, and execute.
Go into a folder, and run the ls -al command.
The weird strings you see on each file line, like drwxr-xr-x, define the permissions of the file or folder.
Let’s dissect it.
The first letter indicates the type of file:
-means it’s a normal filedmeans it’s a directorylmeans it’s a link
Then you have 3 sets of values:
- The first set represents the permissions of the owner of the file
- The second set represents the permissions of the members of the group the file is associated to
- The third set represents the permissions of the everyone else
Those sets are composed by 3 values. rwx means that specific persona has read, write and execution access. Anything that is removed is swapped with a -, which lets you form various combinations of values and relative permissions: rw-, r--, r-x, and so on.
You can change the permissions given to a file using the chmod command.
chmod can be used in 2 ways. The first is using symbolic arguments, the second is using numeric arguments. Let’s start with symbols first, which is more intuitive.
You type chmod followed by a space, and a letter:
astands for allustands for usergstands for groupostands for others
Then you type either + or - to add a permission, or to remove it. Then you enter one or more permission symbols (r, w, x).
All followed by the file or folder name.
Here are some examples:
chmod a+r filename #everyone can now read
chmod a+rw filename #everyone can now read and write
chmod o-rwx filename #others (not the owner, not in the same group of the file) cannot read, write or execute the file
You can apply the same permissions to multiple personas by adding multiple letters before the +/-:
chmod og-r filename #other and group can't read any more
In case you are editing a folder, you can apply the permissions to every file contained in that folder using the -r (recursive) flag.
Numeric arguments are faster but I find them hard to remember when you are not using them day to day. You use a digit that represents the permissions of the persona. This number value can be a maximum of 7, and it’s calculated in this way:
1if has execution permission2if has write permission4if has read permission
This gives us 4 combinations:
0no permissions1can execute2can write3can write, execute4can read5can read, execute6can read, write7can read, write and execute
We use them in pairs of 3, to set the permissions of all the 3 groups altogether:
chmod 777 filename
chmod 755 filename
chmod 644 filename
The Linux umask command
When you create a file, you don’t have to decide permissions up front. Permissions have defaults.
Those defaults can be controlled and modified using the umask command.
Typing umask with no arguments will show you the current umask, in this case 0022:
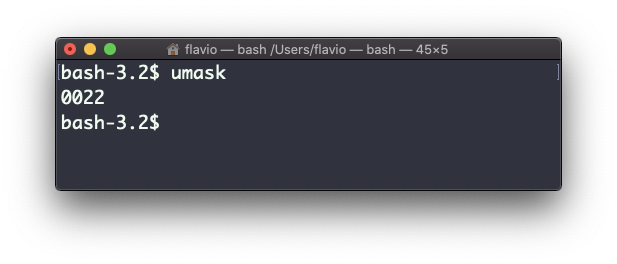
What does 0022 mean? That’s an octal value that represents the permissions.
Another common value is 0002.
Use umask -S to see a human-readable notation:
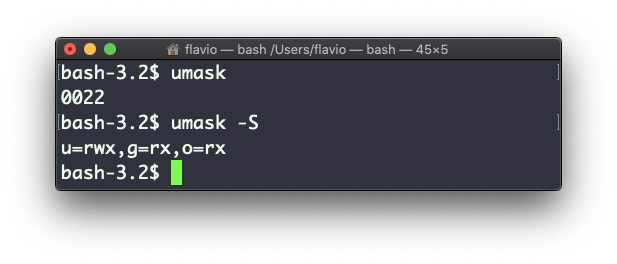
In this case, the user (u), owner of the file, has read, write and execution permissions on files.
Other users belonging to the same group (g) have read and execution permission, same as all the other users (o).
In the numeric notation, we typically change the last 3 digits.
Here’s a list that gives a meaning to the number:
0read, write, execute1read and write2read and execute3read only4write and execute5write only6execute only7no permissions
Note that this numeric notation differs from the one we use in chmod.
We can set a new value for the mask setting the value in numeric format:
umask 002
or you can change a specific role’s permission:
umask g+r
The Linux du command
The du command will calculate the size of a directory as a whole:
du
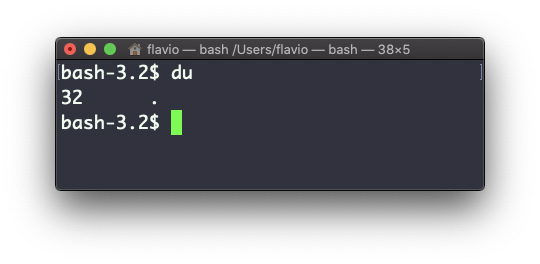
The 32 number here is a value expressed in bytes.
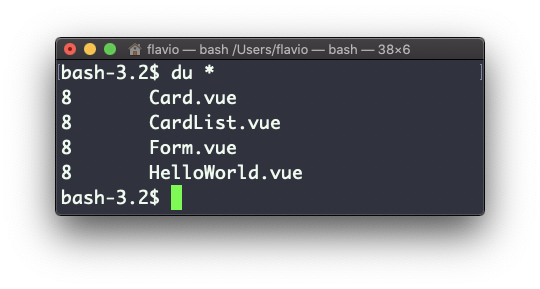
Running du * will calculate the size of each file individually:
You can set du to display values in MegaBytes using du -m, and GigaBytes using du -g.
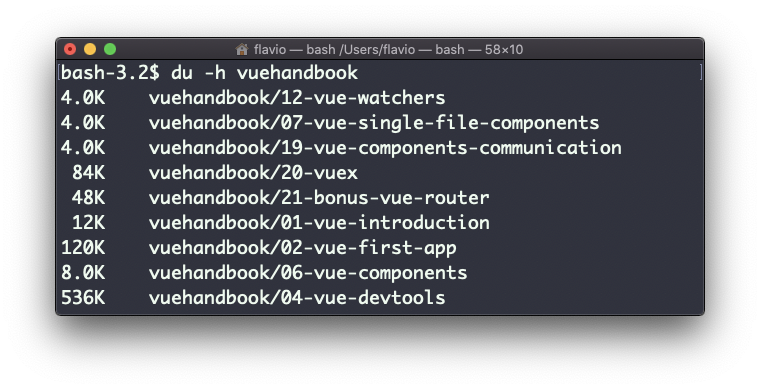
The -h option will show a human-readable notation for sizes, adapting to the size:
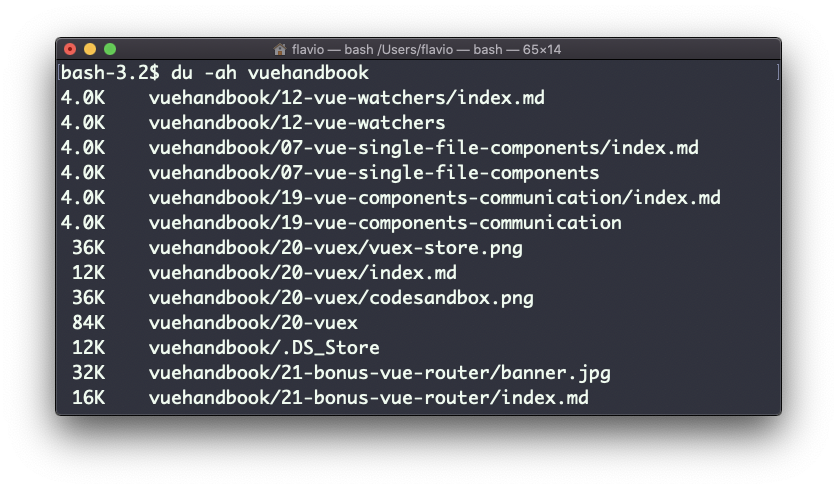
Adding the -a option will print the size of each file in the directories, too:
A handy thing is to sort the directories by size:
du -h <directory> | sort -nr
and then piping to head to only get the first 10 results:
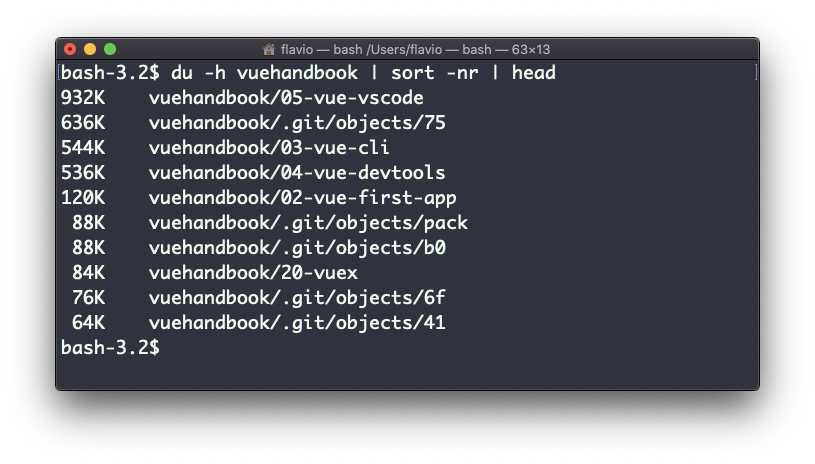
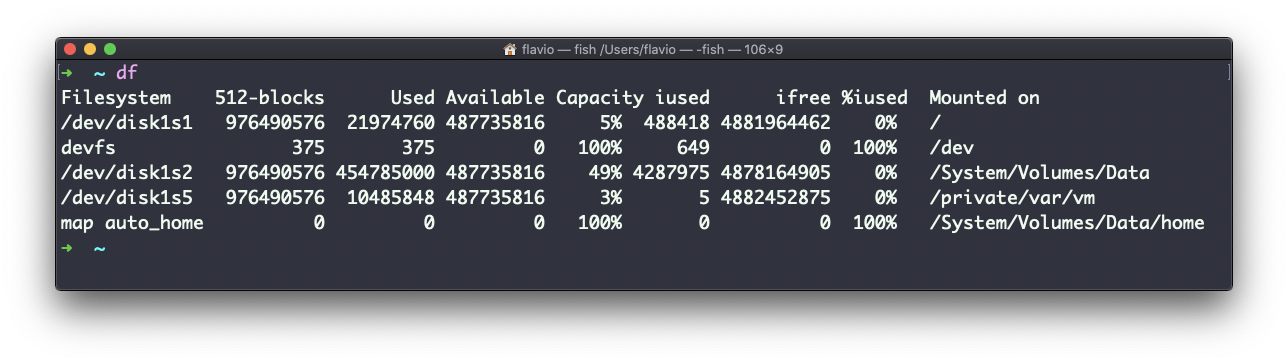
The Linux df command
The df command is used to get disk usage information.
Its basic form will print information about the volumes mounted:
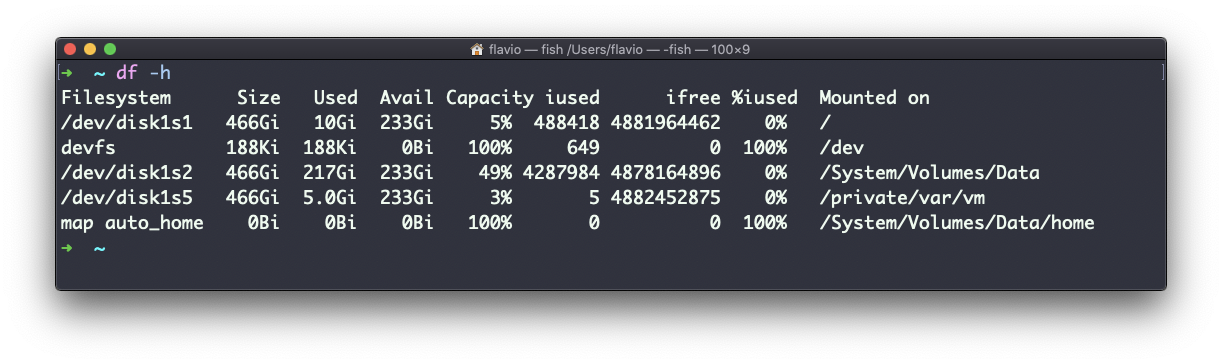
Using the -h option (df -h) will show those values in a human-readable format:
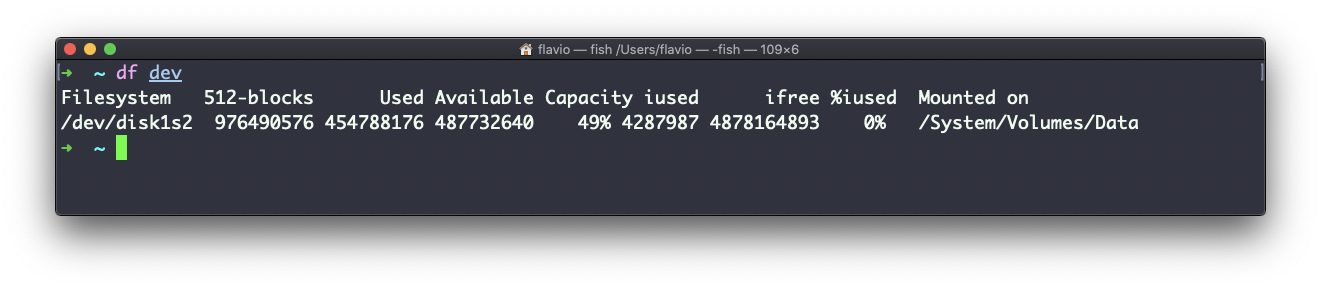
You can also specify a file or directory name to get information about the specific volume it lives on:
The Linux crontab command
Cron jobs are jobs that are scheduled to run at specific intervals. You might have a command perform something every hour, or every day, or every 2 weeks. Or on weekends.
They are very powerful, especially when used on servers to perform maintenance and automations.
The crontab command is the entry point to work with cron jobs.
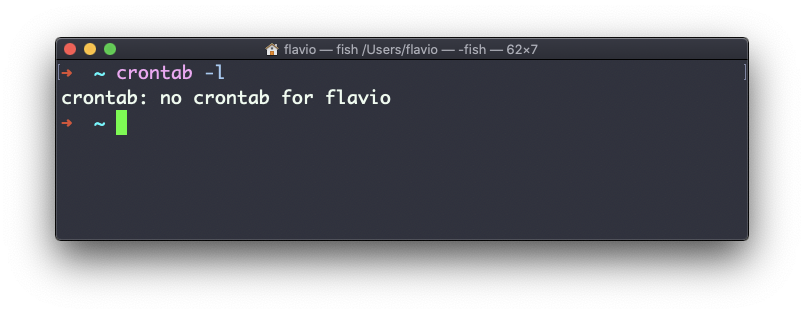
The first thing you can do is to explore which cron jobs are defined by you:
crontab -l
You might have none, like me:
Run
crontab -e
to edit the cron jobs, and add new ones.
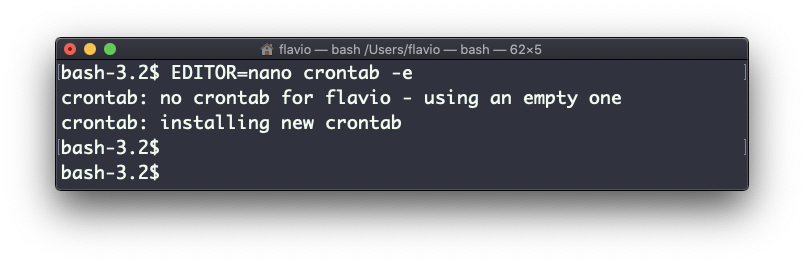
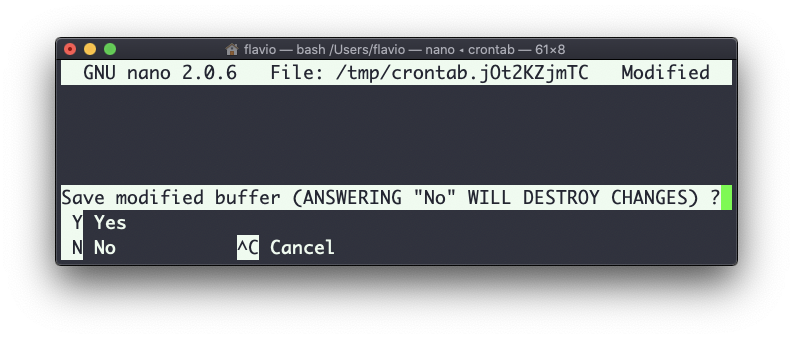
By default this opens with the default editor, which is usually vim. I like nano more. You can use this line to use a different editor:
EDITOR=nano crontab -e
Now you can add one line for each cron job.
The syntax to define cron jobs is kind of scary. This is why I usually use a website to help me generate it without errors: https://crontab-generator.org/
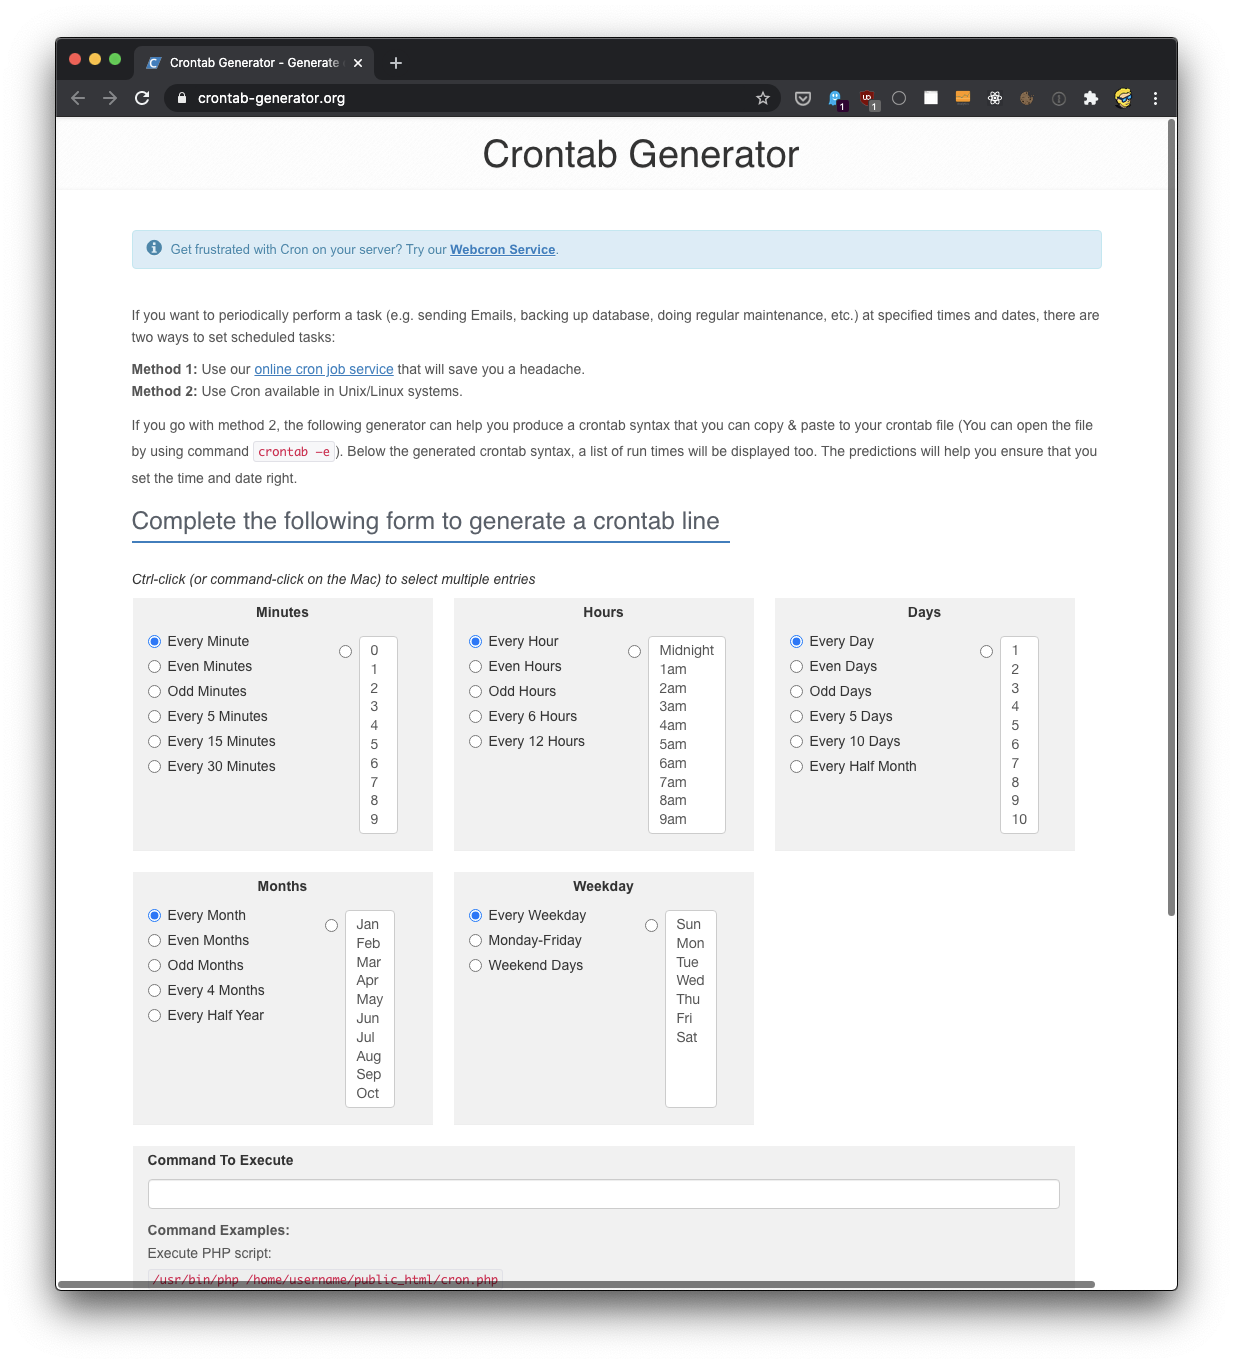
You pick a time interval for the cron job, and you type the command to execute.
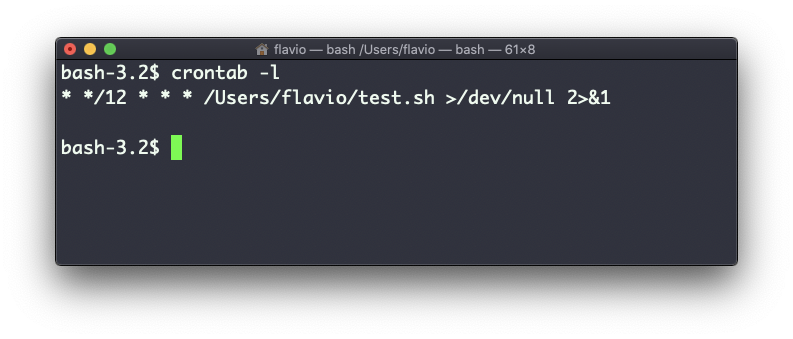
I chose to run a script located in /Users/flavio/test.sh every 12 hours. This is the crontab line I need to run:
* */12 * * * /Users/flavio/test.sh >/dev/null 2>&1
I run crontab -e:
EDITOR=nano crontab -e
and I add that line, then I press ctrl-X and press y to save.
If all goes well, the cron job is set up:
Once this is done, you can see the list of active cron jobs by running:
crontab -l
You can remove a cron job running crontab -e again, removing the line and exiting the editor:

The Linux env command
The env command can be used to pass environment variables without setting them on the outer environment (the current shell).
Suppose you want to run a Node.js app and set the USER variable to it.
You can run
env USER=flavio node app.js
and the USER environment variable will be accessible from the Node.js app via the Node process.env interface.
You can also run the command clearing all the environment variables already set, using the -i option:
env -i node app.js
In this case you will get an error saying env: node: No such file or directory because the node command is not reachable, as the PATH variable used by the shell to look up commands in the common paths is unset.
So you need to pass the full path to the node program:
env -i /usr/local/bin/node app.js
Try with a simple app.js file with this content:
console.log(process.env.NAME)
console.log(process.env.PATH)
You will see the output as
undefined
undefined
You can pass an env variable:
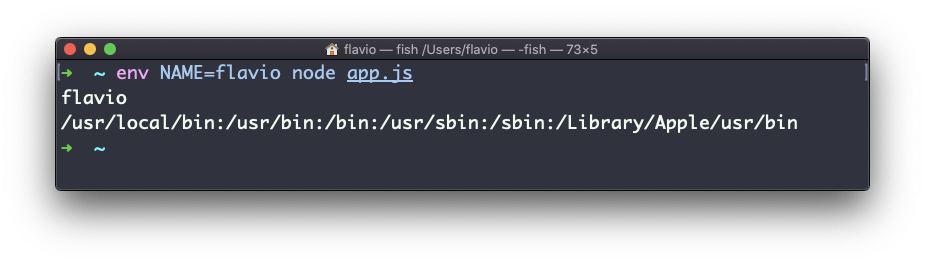
env -i NAME=flavio node app.js
and the output will be
flavio
undefined
Removing the -i option will make PATH available again inside the program:
The env command can also be used to print out all the environment variables. If run with no options:
env
it will return a list of the environment variables set, for example:
HOME=/Users/flavio
LOGNAME=flavio
PATH=/usr/local/bin:/usr/bin:/bin:/usr/sbin:/sbin:/Library/Apple/usr/bin
PWD=/Users/flavio
SHELL=/usr/local/bin/fish
You can also make a variable inaccessible inside the program you run, using the -u option. For example this code removes the HOME variable from the command environment:
env -u HOME node app.js
The Linux printenv command
Here’s a quick guide to the printenv command, used to print the values of environment variables
In any shell there are a good number of environment variables, set either by the system, or by your own shell scripts and configuration.
You can print them all to the terminal using the printenv command. The output will be something like this:
HOME=/Users/flavio
LOGNAME=flavio
PATH=/usr/local/bin:/usr/bin:/bin:/usr/sbin:/sbin:/Library/Apple/usr/bin
PWD=/Users/flavio
SHELL=/usr/local/bin/fish
with a few more lines, usually.
You can append a variable name as a parameter, to only show that variable value:
printenv PATH

Remember that you can download this handbook in PDF / ePub / Mobi format here if you want. ( Author: @flaviocopes)