

Let´s say , we have a new site project with WordPress. To simplify infrastructure management, we want to deploy all the components in Docker containers. For this, we are going to create two containers:
- a MySQL container;
- a WordPress container.
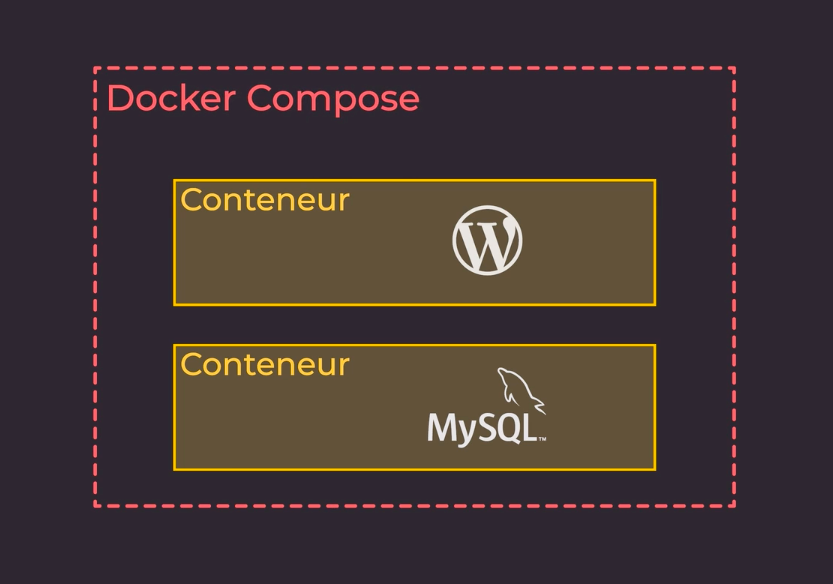
First, we need to create a docker-compose.yml file at the root of our project. In it, we will describe all the resources and services necessary to achieve our goal.
Describe our first service: db
Set the version of Docker Compose
A docker-compose.yml file always begins with the following information:

The version argument allows you to specify to Docker Compose which version you want to use. In our case, we will use version 3, which is currently the most used version. (3.8 actually)
Declare the first service and its image
We are now going to declare our first service, and therefore create our WordPress stack!
PS: The set of containers that must be created must be defined under the services argument. Each container begins with a name ; in our case, our first container will be named db.

Then, you need to describe your container; in our case, we’re using the image argument which allows us to define the Docker image we want to use.
PS: Instead of “image” property ,we could also have used the “build” argument by specifying the path to our Dockerfile; so, when running Docker Compose, it would have built the container through the Dockerfile before running it.
Set the volume to persist our data

As a reminder, keep in mind that Docker containers are not made to run stateful services, and a database is by definition a stateful service. However, you can use the “volumes” argument which allows you to store the entire contents of the /var/lib/mysql folder in a persistent disk. And therefore, to be able to keep the data locally on our host.
PS: This description is present thanks to the line db_data: /var/lib/mysql. db_data is a volume created by Docker directly, which allows data to be written to the host disk without specifying the exact location. We could also have made a /data/mysql:/var/lib/mysql which would also be functional.
Set the container restart policy

PS: The containers being by definition single-process, if this one encounters a fatal error, it can be brought to stop. In our case, if the MySQL server stops, it will restart automatically thanks to the restart: always argument.
Set the environment variables
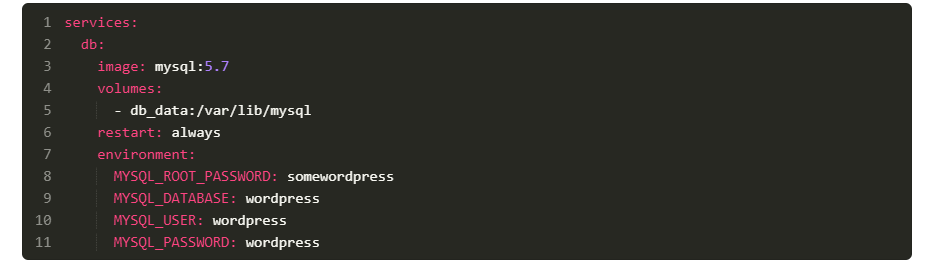
PS: The supplied MySQL image has several environment variables that you can use; in our case, we will give the container the values ??of the different passwords and users that must exist on this database. When you want to give environment variables to a container, you need to use the environment argument, like we used in the docker-compose.yml file above.
Describe our second service: WordPress
In the second service, we create a container that will contain the necessary to make our site work with WordPress. This allows us to introduce two additional arguments.
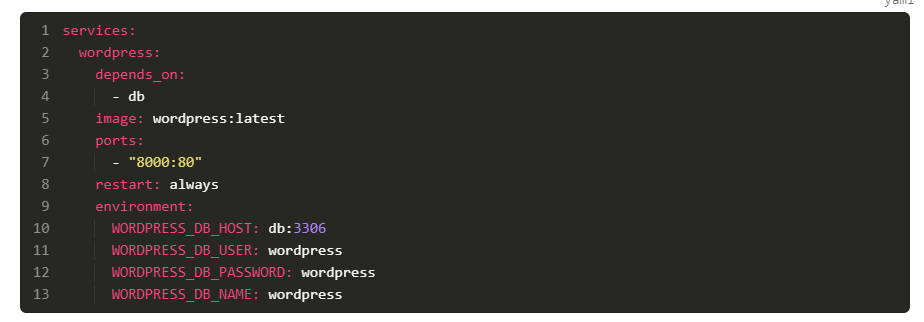
The first argument, “depends_on“, allows us to create a dependency between two containers. So Docker will start the db service before starting the WordPress service. Which is desirable behavior, because WordPress depends on the database to function properly.
The second argument, “ports”, allows us to tell Docker Compose that we want to expose a port from our host machine to our container, and thus make it accessible from the outside.
Here is the docker-compose.yml file in its final version:

Launch your Docker Compose stack
When you run your containers with the docker-compose up -d command, you should have the following output:
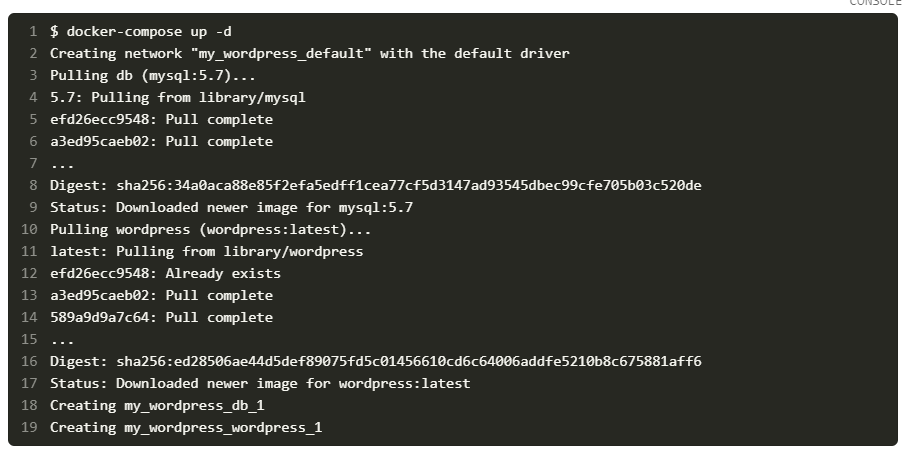
When executing this command, Docker Compose starts by checking whether we have the necessary images locally to launch the stacks. Otherwise, it downloads them from a registry, or builds them via a docker build.
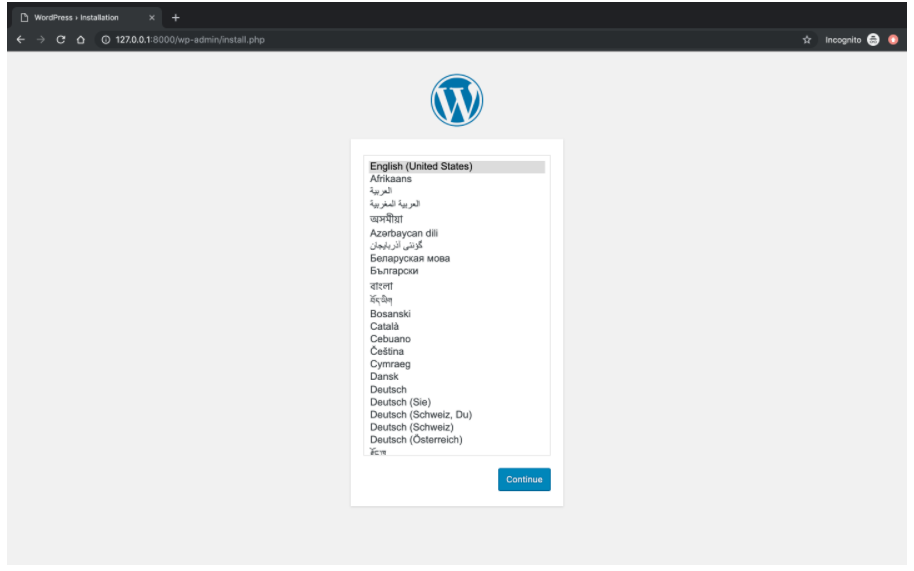
This then launches the two containers on your system; in our case, you will be able to see the result by opening the following URL in your browser: http://127.0.0.1:8000
Summary
Here are the arguments we have seen in this chapter:
- image which allows to specify the source image for the container;
- build which allows you to specify the source Dockerfile to create the container image;
- volume that allows you to specify the mount points between the host system and the containers;
- restart which allows you to define the behavior of the container if case of the process stopping;
- environment which allows you to define environment variables;
- depends_on which allows to say that the container depends on another container;
- ports which allows you to define the ports available between the host machine and the container.
Commands
- docker-compose ps will allow you to see the status of your entire stack;
- docker-compose stop will allow you to stop all the services of a stack.
- docker-compose down will allow you to destroy all the resources of a stack;
- docker-compose config will allow you to validate the syntax of your docker-compose.yml file.
- docker-compose logs -f –tail 5 will allow you to display the logs of your stack;