If you’re a frontend dev in the world today you’ve probably heard of (and possibly even used) webpack. The Angular build process uses webpack behind the scenes to transpile TypeScript to JavaScript, transform Sass files to CSS, and many other tasks. To understand the importance of this build tool, it helps to understand why it exists.
Browsers have very limited support for JavaScript modules. In practice, any JavaScript application loaded into the browser should be contained in a single source file. On the other hand, it is good software development practice to separate out code into modules contained in separate files. When deploying a JavaScript application for the browser, the modules must then be built into a single source file. Bundling multiple modules into a single file is the main purpose of webpack.
Webpack is not limited to simply bundling source files. Because it can support a multitude of plugins, it can perform many additional tasks. Webpack module loaders are able to parse different file types. This allows, for example, Angular TypeScript files to use the import statement to import stylesheet files. Usually, webpack is hidden behind the Angular command-line tool. But in some cases, it may be necessary to tweak the configuration of webpack when building an Angular application.
In earlier versions of Angular, it was possible to eject the webpack configuration and modify it directly. But, since Angular 8, access to the base configuration has been disabled. But it is still possible to extend the webpack configuration and add additional loaders or configuration options. In this tutorial,we will see how to create an Angular application and tweak the webpack configuration.
Set Up Angular With Webpack
To allow customization of the webpack configuration, you will need to install the custom webpack Angular builder. Navigate into the Project directory and run the following command.
npm i @angular-builders/custom-webpackYou will be using the webpack-define plugin to inject global value definitions into your code. As an example, this could be used to feature flag parts of your applications.
To enable custom webpack configurations, open the angular.json configuration file. Locate the line "builder": "@angular-devkit/build-angular:browser" inside the architect.build section. Replace it with the following lines.
"builder": "@angular-builders/custom-webpack:browser",Now, inside architect.build.options add the following property.
"customWebpackConfig": {
  "path": "./custom-webpack.config.js"
},
This adds the custom-webpack.config.js to the default webpack configuration for the ng build command. To also enable the configuration for the ng serve command, locate the line "builder": "@angular-devkit/build-angular:dev-server", and replace it with the code below.
"builder": "@angular-builders/custom-webpack:dev-server",Now create the file custom-webpack.config.js and paste the following content into it.
const webpack = require('webpack');

module.exports = {
  plugins: [
    new webpack.DefinePlugin({
      'STABLE_FEATURE': JSON.stringify(true),
      'EXPERIMENTAL_FEATURE': JSON.stringify(false)
    })
  ]
};
This creates two global constants, STABLE_FEATURE and EXPERIMENTAL_FEATURE, and makes them available in your application. To read more about the usage of the DefinePlugin, please see the DefinePlugin’s documentation.
The DemoComponent will display content depending on the feature flags that you defined in the webpack configuration. Open demo.component.ts file and paste the following code into it.
import { Component, OnInit } from '@angular/core';

declare const STABLE_FEATURE: boolean;
declare const EXPERIMENTAL_FEATURE: boolean;

@Component({
  selector: 'app-demo',
  templateUrl: './demo.component.html',
  styleUrls: ['./demo.component.css']
})
export class DemoComponent implements OnInit {
  stableFeature: string;
  experimentalFeature: string;

  constructor() { }

  ngOnInit() {
    this.stableFeature = STABLE_FEATURE ? 'Stable feature enabled' : 'Stable feature disabled';
    this.experimentalFeature = EXPERIMENTAL_FEATURE ? 'Experimental feature enabled' : 'Experimental feature disabled';
  }
}
Note the declarations of STABLE_FEATURE and EXPERIMENTAL_FEATURE at the top of the file. These are needed for TypeScript to know that the two constants exist. But also notice that no values are assigned here.
Next, open the file demo.component.html and replace the contents with the following lines.
<div class="container">
  <div class="row mt-5">
    <div class="col-sm col-md-8 offset-md-2">
      <h2>Demo Features</h2>
      <p>
        {{stableFeature}}
      </p>
      <p>
        {{experimentalFeature}}
      </p>
    </div>
  </div>
</div>
Add Angular
Well done! You have completed the implementation of an Angular application with a custom webpack configuration.
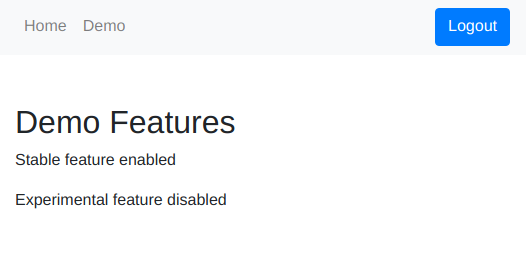
You can try out the application by opening the terminal again and running the following command.
ng serveOpen your browser and navigate to http://localhost:4200/ and you will see your application. You should see something like this.